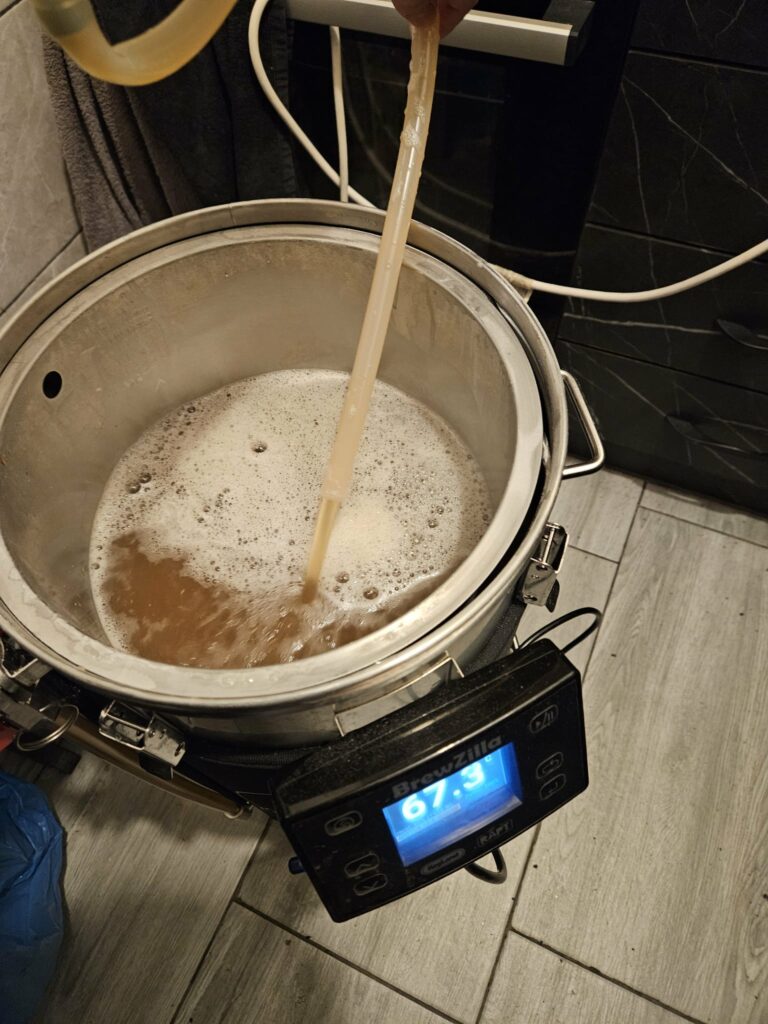
Én ezt feljavítanám, de nem azért, mert rossz. Az alap szerkezete jó és egy kezdő számára érthető. Inkább néhány szakmai pontatlanságot javítanék, és hozzáadnék pár fontos lépést, ami most hiányzik: water preparation, mash pH, vorlauf opcionálisan, whirlpool, oxygenation/aeration, gravity measurements, illetve a cold crash nem minden sörnél kötelező.
A címet is kereshetőbbre cserélném. Ezt használnám:
How Beer Is Made – The Homebrewing Process Step by Step
Brewing beer may look complicated at first, but the basic process is surprisingly logical.
We begin with malted grain, extract its sugars with hot water, boil the resulting wort with hops, cool it, add yeast, allow fermentation to transform the sugars into alcohol and carbon dioxide, and finally package and carbonate the finished beer.
Every brewer develops their own techniques over time, but the fundamental stages remain largely the same.
Here is the complete process from grain to glass.
1. Preparing the Brewing Water
Before the grain even reaches the mill, it is worth thinking about the largest ingredient in beer:
water.
Brewing water influences mash pH, fermentation performance, bitterness, mouthfeel and the overall balance of the finished beer.
Depending on the source water and beer style, brewers may adjust minerals such as:
- calcium
- chloride
- sulfate
- magnesium
- sodium
- bicarbonate
Chlorine and chloramine should also be removed when present because they can contribute unpleasant chlorophenolic flavors.
Water chemistry can become quite technical, but beginners do not need to make it complicated. Good-quality water is enough to start brewing; mineral adjustments can come later as you learn to control your recipes more precisely.
2. Milling the Grain
The first physical step is crushing the malted grain.
A grain mill cracks the kernels and exposes the starch-rich interior, called the endosperm.
The objective is not to turn the malt into flour.
Ideally, the interior is broken into smaller particles while much of the husk remains relatively intact.
Why?
Because in many brewing systems the husks later help form a natural filter bed during lautering.
The crushed malt is called the grist.
3. Mashing
The grist is mixed with hot brewing water – traditionally called liquor in brewing terminology.
The resulting mixture is the mash.
This is where one of the most important transformations in brewing takes place.
Malted grain contains enzymes capable of breaking large starch molecules into smaller sugars that yeast can later ferment.
Mash Temperature
A typical single-infusion mash may be held somewhere around:
64–70°C / 147–158°F
for approximately:
60 minutes, although recipes and processes vary.
Mash temperature influences the balance between fermentable sugars and larger dextrins.
Generally:
Lower mash temperatures favor a more fermentable wort and can contribute to a drier finished beer.
Higher mash temperatures tend to leave more dextrins and can contribute to greater body and residual fullness.
This isn’t an absolute switch – there are many interacting factors – but it is a useful principle when designing recipes.
Mash pH
Temperature is not the only important variable.
Mash pH also matters.
A commonly useful range is approximately pH 5.2–5.6 when measured at room temperature.
The grain bill and brewing-water alkalinity strongly influence where the mash settles, so experienced brewers often measure pH and make small acid or mineral adjustments when necessary.
4. Mash Out
Some brewers finish the mash by raising its temperature to approximately:
75–78°C / 167–172°F
This is known as mash out.
It reduces wort viscosity and can make lautering easier while greatly reducing further enzymatic activity.
A typical mash-out rest may last around 10 minutes.
However, mash out is not mandatory in every homebrewing system.
BIAB and modern all-in-one systems, for example, can use somewhat different processes.
5. Lautering and Sparging
Now we need to separate the sugary liquid from the grain.
That liquid is called wort.
Lautering
During traditional lautering, the wort passes through the grain bed while the grain husks help filter out solid material.
Some systems recirculate the first cloudy wort back over the grain bed until it becomes clearer. This step is commonly called vorlauf.
Modern brewing systems may accomplish the same basic job differently.
Sparging
After most of the wort has been collected, additional hot water can be passed through or over the grain to rinse out remaining sugars.
This is sparging.
Sparge water is commonly kept around 75–78°C / 167–172°F.
The idea is not to extract every possible last gram of sugar. Excessive sparging, particularly under unfavorable pH conditions, can extract unwanted compounds and negatively affect the beer.
BIAB brewers may skip sparging completely.
6. Boiling the Wort
The collected wort is transferred to the kettle and brought to a vigorous, controlled boil.
A typical homebrew boil lasts around:
60 minutes
although some recipes use shorter or longer boils.
Boiling performs several important functions.
It stops enzymatic activity, reduces the microbial load, coagulates proteins, concentrates the wort and drives off unwanted volatile compounds.
And, of course, this is traditionally where hops enter the process.
7. Hop Additions
Hops can perform several different jobs depending on when they are added.
Bittering Hops
Hops added early in the boil contribute primarily bitterness.
Heat converts hop alpha acids into more soluble bitter compounds through a process called isomerization.
This is an important part of what creates the bitterness commonly expressed in IBU – International Bitterness Units.
Late Hop Additions
Hops added during the final 5–20 minutes of the boil retain more of their flavor and aromatic character than hops boiled for a long period.
Flameout
When the heat is turned off, hops can be added immediately.
These additions provide substantial hop flavor and aroma with generally less bitterness than a long boil addition.
8. Whirlpool
Modern hop-forward brewing often adds another stage after the boil:
the whirlpool or hop stand.
Instead of immediately cooling the wort all the way to fermentation temperature, hops may be added while the wort is still hot.
Depending on the recipe, this may occur around 70–90°C / 158–194°F.
Whirlpool additions can extract large amounts of hop flavor and aroma while producing less bitterness than traditional long-boil additions.
Temperature and contact time matter: a hotter whirlpool can still contribute significant bitterness.
For modern Pale Ales, IPAs and NEIPAs, this has become one of the most useful hop-addition techniques.
9. Cooling the Wort
Once the boil and any hot-side hop additions are complete, the wort needs to be cooled to fermentation temperature.
A wort chiller makes this much faster.
From this point onward, sanitation becomes critical.
The wort is no longer protected by boiling temperatures, so anything touching it must be properly cleaned and sanitized.
The target temperature depends primarily on the yeast strain.
Typical ale fermentation might begin around:
18–22°C / 64–72°F
Many traditional lager fermentations begin considerably cooler, often around:
8–13°C / 46–55°F
But modern yeast strains can operate outside these traditional ranges.
Always follow the recommended temperature range for the actual yeast you are using rather than relying only on “ale” or “lager” labels.
10. Transfer and Aeration
The cooled wort is transferred into a sanitized fermenter.
Before or around pitching, yeast needs access to oxygen during its early growth phase.
Homebrewers may introduce oxygen by shaking or splashing the wort during transfer, using an aeration system, or injecting controlled oxygen.
This is one of the few moments during brewing when introducing oxygen can be beneficial.
Once fermentation is underway and especially after fermentation, the situation reverses:
oxygen becomes something we generally want to avoid.
Oxidation can rapidly damage hop aroma and eventually create stale flavors.
11. Pitching the Yeast
Adding yeast to the cooled wort is called pitching.
Yeast consumes fermentable sugars and produces:
ethanol + carbon dioxide + flavor and aroma compounds.
But yeast does much more than simply manufacture alcohol.
The strain, fermentation temperature, pitching rate, wort composition and fermentation conditions all influence the final character of the beer.
A clean American ale yeast, expressive English strain, Belgian yeast and lager strain can produce dramatically different beers from similar wort.
12. Fermentation
Visible primary fermentation can last anywhere from a few days to considerably longer.
For many ales, the main activity occurs within roughly 5–10 days, but the calendar should not determine whether fermentation is finished.
The important measurement is specific gravity (SG).
When gravity has reached the expected range and remains stable, fermentation is generally much closer to completion.
A hydrometer or other gravity-measuring instrument is therefore far more useful than simply saying:
“It has been seven days, so the beer must be finished.”
Temperature Control
Fermentation temperature is one of the most important controls available to a brewer.
Too warm or too cold can change yeast performance and the flavors it produces.
Different yeasts require different conditions, so the manufacturer’s recommended range provides a useful starting point.
13. What Is Dry Hopping?
Dry hopping means adding hops after the boil, usually during or after fermentation.
The purpose is primarily to add intense hop aroma and flavor rather than traditional kettle bitterness.
Depending on the hop variety, this can produce aromas reminiscent of:
citrus, tropical fruit, stone fruit, berries, pine, resin, herbs, flowers and many others.
When Should You Dry Hop?
There is no single correct schedule.
Some brewers add hops while fermentation is still active.
Others wait until fermentation is nearly or completely finished.
Modern brewers may also use multiple dry-hop additions.
Contact time can range from roughly one or two days to several days, depending on temperature, hop quantity, equipment and the character being targeted.
The old rule that dry hops must always remain in beer for 5–7 days is no longer necessary.
Large modern dry-hop additions can extract substantial aroma surprisingly quickly.
Oxygen Is the Enemy
One of the greatest risks during dry hopping is not infection – it is oxygen exposure.
This is particularly important with heavily hopped beers such as NEIPA.
Opening the fermenter, adding hops and transferring the beer can introduce oxygen that rapidly damages fresh hop character.
Closed transfers, CO₂ purging and careful handling can greatly improve shelf life.
14. Conditioning and Maturation
Once fermentation is complete, beer often benefits from some additional time.
During conditioning, yeast and suspended material settle, flavors integrate and the beer begins developing its finished character.
Some beers require very little maturation.
Others improve considerably with time.
A fresh NEIPA and a strong Belgian ale, Imperial Stout or traditional lager have very different maturation requirements.
15. Cold Crashing
Cold crashing means reducing the temperature of the finished beer, often to approximately:
2–4°C / 35–39°F
for a few days.
This encourages yeast, hop particles and other suspended material to settle more quickly.
The result can be cleaner transfers and clearer beer.
But cold crashing is optional, not a mandatory stage of brewing.
It is also worth remembering that cooling a sealed fermenter reduces internal pressure and can pull air inward unless the system is designed to prevent it.
For oxygen-sensitive beers, especially heavily hopped styles, this deserves attention.
16. Packaging – Bottles or Kegs
Once the beer is ready, it needs to be packaged.
The two most common homebrewing methods are:
bottling and kegging.
Whichever method you choose, everything that contacts the finished beer must be clean and sanitized.
At this stage, oxygen exposure should also be minimized.
17. Bottle Conditioning
For bottle-conditioned beer, a carefully calculated quantity of priming sugar is added before bottling.
Residual yeast ferments this small amount of sugar inside the sealed bottle.
Because the CO₂ cannot escape, it dissolves into the beer and creates natural carbonation.
Many beers carbonate in approximately:
2–3 weeks at suitable room temperature
but yeast health, beer strength, temperature and desired carbonation level can change this considerably.
The amount of priming sugar should always be calculated for the:
beer volume + beer temperature + desired CO₂ level.
Too little produces flat beer.
Too much can create excessive pressure and potentially dangerous bottles.
18. Kegging and Force Carbonation
Beer can instead be transferred into a keg and carbonated using external CO₂.
The simplest method is to set the regulator to the pressure appropriate for the beer temperature and desired carbonation level, then allow the keg to equilibrate.
Higher-pressure burst carbonation can accelerate the process but requires more attention to avoid overcarbonation.
Kegging also makes it possible to perform closed transfers, helping reduce oxygen exposure.
From Grain to Glass
The complete process can therefore be summarized as:
Water → Milling → Mashing → Lautering/Sparging → Boiling → Hops → Whirlpool → Cooling → Yeast → Fermentation → Dry Hopping → Conditioning → Packaging → Carbonation → Glass
It looks like a lot when written out.
After a few brew days, however, it becomes a natural sequence.
And once you understand why each stage exists, brewing becomes much more than following a recipe.
You begin to understand which part of the process to change when you want a beer that is drier, fuller, clearer, more bitter, more aromatic or simply more consistent.
That is where homebrewing becomes really interesting.