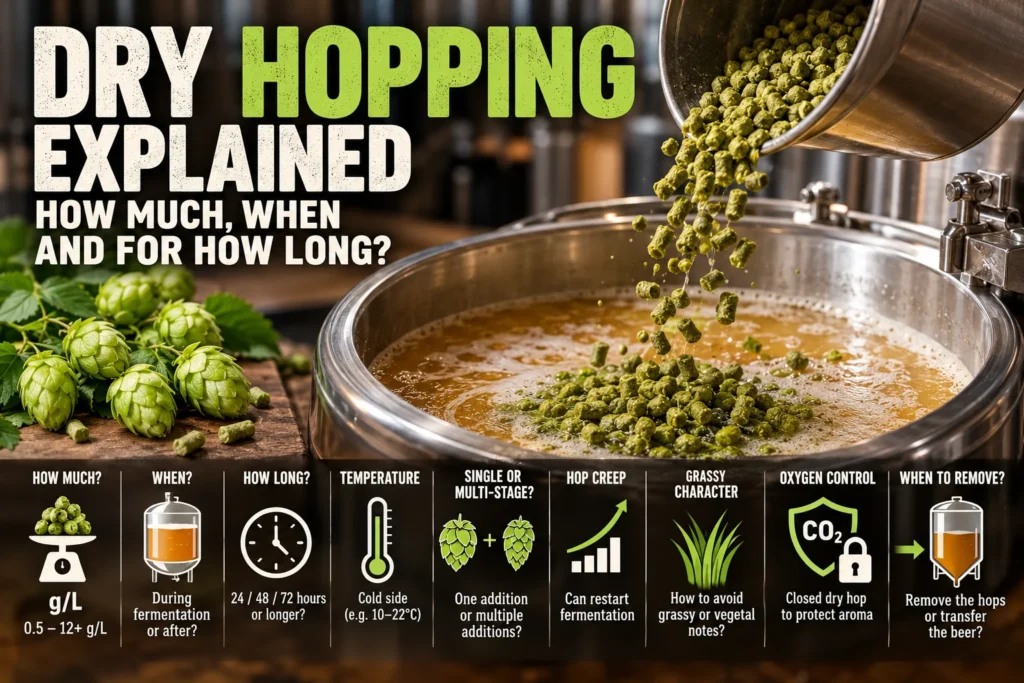
Dry hopping is one of the most effective ways to create intense hop aroma and fresh hop flavor in beer.
Unlike kettle additions and whirlpool hopping, dry hopping takes place on the cold side of the brewing process, usually during fermentation or after most fermentation has finished.
The hops are no longer being boiled.
Instead, aromatic compounds are extracted directly into the beer.
This makes dry hopping especially important in styles such as:
- American Pale Ale
- IPA
- West Coast IPA
- Hazy IPA / NEIPA
- Double IPA
- modern hoppy lager
- Cold IPA
- heavily hopped Session Ale
But simply adding a large quantity of hops to a fermenter does not guarantee better beer.
Dry hopping introduces several important variables:
How much hops should be used?
When should they be added?
At what temperature?
How long should they remain in contact with the beer?
Should the hops be added during fermentation or after fermentation?
Should the dry hop be split into multiple additions?
And perhaps most importantly:
How can the brewer add hops without introducing oxygen?
Modern dry hopping is therefore not just about hop quantity.
It is about controlling:
dose + timing + temperature + contact time + oxygen exposure.
Understanding these variables allows you to create more hop aroma while avoiding unnecessary hop material, grassy character, hop creep and oxidation.
What Is Dry Hopping?
Dry hopping means adding hops to beer after the hot side of the brewing process.
The hops are normally added to the fermenter, although they may also be added to another closed vessel such as a conditioning tank or keg.
Because the beer is no longer boiling, the purpose is not conventional alpha-acid isomerization.
The primary objectives are:
aroma
and
fresh hop flavor.
Dry hopping can contribute characteristics such as:
- citrus
- tropical fruit
- stone fruit
- pine
- resin
- floral
- herbal
- berry
- white wine
- gooseberry
- passion fruit
- mango
- peach
- grapefruit
depending on the hop variety and brewing process.
This is why the dry hop often has a major influence on the final identity of modern hop-forward beer.
What Happens During Dry Hopping?
When hops enter beer, aromatic compounds begin moving from the hop material into the liquid.
Many hop oils and other compounds can be extracted without boiling.
Extraction begins relatively quickly.
This is an important point because traditional homebrewing advice sometimes recommended leaving dry hops in beer for one or even two weeks.
Modern brewing experience has shown that very long contact times are often unnecessary.
A large proportion of useful aroma extraction can occur within the first few days.
That is why dry-hop schedules such as:
24 hours
48 hours
or
72 hours
are now common.
Longer contact does not automatically mean stronger or better aroma.
How Much Dry Hop Should You Use?
Dry hopping is often expressed as:
grams of hops per liter of beer — g/L.
This is much more useful than simply saying:
“Add 100 grams of hops.”
One hundred grams in 10 liters is very different from 100 grams in 40 liters.
For example:
100 g in 20 L = 5 g/L
The formula is simple:
Dry Hop Rate (g/L) = Hop Weight (g) ÷ Beer Volume (L)
So:
150 g ÷ 25 L = 6 g/L
This makes recipes much easier to compare.
Practical Dry Hop Rates
There is no universal correct amount, but useful practical ranges can help.
| Dry Hop Rate | Typical Character |
| 0.5–2 g/L | Light hop aroma |
| 2–4 g/L | Noticeable aroma |
| 4–6 g/L | Strong hop-forward character |
| 6–8 g/L | Heavy IPA-level dry hopping |
| 8–12 g/L | Very intense modern IPA / NEIPA territory |
| 12+ g/L | Extremely heavy dry hopping with diminishing returns and higher losses |
These are not strict style rules.
Hop variety, hop product, beer strength, fermentation conditions and process all influence the result.
But the table provides a useful starting point.
More Dry Hops Do Not Always Mean More Aroma
This is one of the most important lessons in modern dry hopping.
It is tempting to think:
twice as many hops = twice as much aroma.
That is not how extraction works.
At higher dry-hop rates, the increase in aroma eventually begins to show diminishing returns.
You may add significantly more hops but receive only a modest increase in desirable aroma.
At the same time, very large dry-hop additions can create disadvantages:
- increased beer loss;
- more hop sediment;
- greater oxygen exposure during handling;
- stronger polyphenol extraction;
- harsher hop character;
- increased hop creep risk;
- vegetal or grassy character;
- blocked valves or transfers.
The objective is therefore not:
use as much hops as possible.
The objective is:
use enough hops to create the desired character efficiently.
Beer Loss From Heavy Dry Hopping
Hops absorb beer.
This becomes increasingly noticeable when using large dry-hop charges.
A lightly hopped Pale Ale may lose relatively little volume.
A heavily dry-hopped NEIPA can lose a surprising amount of beer because the hop material retains liquid.
This is sometimes called hop absorption loss.
If you want 20 liters of finished beer but plan to use several hundred grams of dry hops, you may need to account for this when planning the batch volume.
Heavy dry hopping therefore affects not only aroma.
It also affects brewhouse yield.
When Should You Dry Hop?
There are two major approaches:
during active fermentation
and
after primary fermentation has mostly finished.
Both can work.
But they can produce different results and create different process considerations.
Dry Hopping During Active Fermentation
Some brewers add hops while fermentation is still visibly active.
For example:
Day 2 or Day 3
when yeast is still fermenting strongly.
This became particularly popular with Hazy IPA and NEIPA brewing.
One reason is the concept of biotransformation.
What Is Hop Biotransformation?
Biotransformation refers to yeast modifying certain hop-derived compounds during fermentation.
Yeast activity can transform some hop compounds into other aromatic forms, potentially changing the final aroma profile.
This interaction is one reason dry hopping during fermentation became popular in modern IPA brewing.
However, the subject is more complicated than the simplified idea:
“Add hops during fermentation and you automatically get more tropical aroma.”
The result depends on:
- yeast strain;
- hop variety;
- timing;
- fermentation activity;
- temperature;
- hop compounds present.
Biotransformation is real, but it should not be treated as a guaranteed aroma button.
The Disadvantage of Dry Hopping Too Early
If hops are added during vigorous fermentation, the large amount of CO₂ escaping from the fermenter can carry some volatile aromatic compounds away.
In other words:
the yeast may interact with the hops, but active fermentation can also strip aroma from the beer.
This creates a trade-off.
Early dry hopping can promote fermentation-related hop interactions.
Later dry hopping may preserve more of the fresh hop aroma.
For this reason, many modern brewers no longer automatically place the entire dry-hop charge at peak fermentation.
Dry Hopping Near the End of Fermentation
Another useful approach is adding hops when fermentation has slowed but yeast is still active.
For example, when gravity is approaching final gravity but has not necessarily become completely stable.
This can provide a useful compromise:
- yeast is still present and active;
- some fermentation-related hop interaction may occur;
- less vigorous CO₂ stripping occurs;
- remaining yeast activity may help consume a small amount of oxygen introduced during the addition.
This can work very well in hop-forward ales.
Dry Hopping After Fermentation
The hops can also be added after primary fermentation has essentially finished.
This is a common method for:
- American Pale Ale;
- West Coast IPA;
- Double IPA;
- hoppy lager;
- many modern IPAs.
The major advantage is that vigorous fermentation is no longer stripping away aroma.
The dry hop can therefore produce a very direct, fresh hop character.
However, once fermentation has finished, the brewer must become particularly careful about:
oxygen.
There may no longer be strong fermentation activity to help remove oxygen introduced during dry hopping.
Which Is Better: During or After Fermentation?
Neither method is universally better.
They emphasize different things.
During Fermentation
Potential advantages:
- yeast–hop interaction;
- possible biotransformation;
- yeast may help consume some introduced oxygen.
Potential disadvantages:
- CO₂ can strip aroma;
- hop compounds can influence fermentation;
- hop creep may complicate the end of fermentation.
After Fermentation
Potential advantages:
- fresher direct hop aroma;
- less aroma stripping;
- easier control of contact time.
Potential disadvantages:
- greater oxidation risk;
- hop creep can restart fermentation;
- oxygen management becomes critical.
The correct choice depends on the beer.
How Long Should Dry Hops Stay in the Beer?
One of the most common questions is:
24, 48, 72 hours — or longer?
For many modern dry-hop schedules, 24–72 hours is enough to extract a substantial amount of aroma.
A practical starting point is:
48 hours.
This is long enough for strong extraction in many situations without unnecessarily extending contact time.
But there is no magic number.
24-Hour Dry Hop
A 24-hour contact can already provide significant aroma.
It can be useful when:
- the dry-hop charge is large;
- temperature is relatively warm;
- fast turnaround is important;
- the brewer wants to minimize vegetal extraction.
A short dry hop does not automatically mean weak aroma.
Extraction can happen surprisingly quickly.
48-Hour Dry Hop
For many homebrewers, 48 hours is an excellent practical standard.
It offers:
- strong aroma extraction;
- manageable contact time;
- reduced need for prolonged hop exposure;
- convenient scheduling.
For a Pale Ale or IPA, a 48-hour dry hop is often a very good starting point.
72-Hour Dry Hop
Seventy-two hours is also widely used.
It can be useful when:
- dry hopping at somewhat lower temperature;
- using moderate hop quantities;
- the brewer wants additional extraction time.
Three days is still a relatively short and controlled contact period.
Many successful beers are dry hopped for approximately 2–3 days.
What About 5–7 Days?
Longer dry hopping can work.
It was once extremely common to leave hops in beer for a week or more.
But it is often unnecessary.
Long contact can increase extraction of less desirable plant-derived compounds.
Depending on the hops and conditions, this can contribute to:
- grassy character;
- herbal character;
- vegetal notes;
- rough polyphenolic character.
That does not mean that beer automatically becomes grassy after exactly four days.
There is no universal deadline.
But if good aroma extraction is already achieved within 48–72 hours, there is often little reason to leave a large dry-hop charge in the beer for another week.
What Causes Grassy or Vegetal Hop Character?
Hops are plant material.
Extended contact can extract compounds beyond the desirable aromatic fraction.
The beer may begin to show character described as:
grass
green leaves
raw vegetation
tea-like
herbal
Sometimes this character comes from the hop variety itself.
Sometimes it comes from large quantities.
Sometimes it is associated with extended contact.
Sometimes it results from poor hop storage or old hops.
Therefore, grassy character cannot always be blamed on contact time alone.
But unnecessarily long exposure can increase the risk.
Dry Hop Temperature
Temperature affects extraction.
Dry hopping warmer generally produces faster extraction.
Dry hopping cooler slows extraction and can change which compounds are emphasized.
Common practical ranges include approximately:
18–22°C
for fermentation-temperature dry hopping,
and
10–16°C
for cooler post-fermentation dry hopping.
Some brewers go colder still.
The correct temperature depends on the process and the beer.
Dry Hopping at Fermentation Temperature
Adding hops at normal ale fermentation temperature — for example around 18–21°C — provides rapid extraction.
This is convenient because the brewer does not need to change temperature before adding the hops.
It can work very well for Pale Ale and IPA.
However, warmer temperatures may also accelerate extraction of some polyphenols and other compounds.
This is another reason very long contact times are often unnecessary.
Cooler Dry Hopping
Some brewers reduce the beer temperature before dry hopping.
For example:
14–16°C
or even lower.
Potential advantages include:
- different extraction profile;
- potentially reduced extraction of some harsher plant material;
- better control over yeast activity;
- reduced hop creep activity at lower temperatures.
The disadvantage is that extraction may take somewhat longer.
Temperature and contact time therefore work together.
Should You Cold Crash Before Dry Hopping?
It depends on the process.
Some brewers partially cool the beer before dry hopping so that more yeast settles out.
This may reduce the amount of yeast present during the dry hop and can change the resulting hop character.
Others prefer to dry hop before the final cold crash.
A practical sequence might be:
finish fermentation → dry hop → 48 hours contact → cold crash → closed transfer
Another method might be:
finish fermentation → partially cool → dry hop → short contact → full cold crash → transfer
Both can work.
The important thing is to understand what each step is trying to accomplish.
Single-Stage Dry Hopping
The simplest method is to add the entire dry-hop charge at once.
For example:
Citra 60 g + Centennial 40 g — 48 hours
This has several advantages:
- simple;
- fewer fermenter openings;
- lower oxygen risk;
- easier scheduling;
- easier to reproduce.
For many beers, a single dry-hop addition is all that is needed.
Multi-Stage Dry Hopping
Some recipes split the hops into two or more additions.
For example:
Dry Hop 1 — during late fermentation
Dry Hop 2 — after fermentation
The idea may be to combine:
- yeast–hop interaction from the first addition;
- fresher aroma from the second addition.
Another reason is simply to divide a very large hop charge.
But multiple additions have a disadvantage:
every addition is another opportunity to introduce oxygen.
Therefore, two dry-hop stages are not automatically better than one.
If the same result can be achieved with one controlled addition, the simpler method may be preferable.
Double Dry Hopped — What Does DDH Mean?
The term DDH, or Double Dry Hopped, is widely used in modern craft beer.
But it does not have one precise universal technical definition.
It may mean:
- two separate dry-hop additions;
- a larger-than-normal dry-hop rate;
- sometimes simply a marketing description for a heavily hopped beer.
Therefore, seeing “DDH IPA” on a label does not tell you exactly how the beer was produced.
From a brewing perspective, it is more useful to know:
total g/L
number of additions
timing
temperature
and
contact time.
What Is Hop Creep?
Hop creep is one of the most important effects associated with dry hopping.
Hops contain enzymes that can break down some of the more complex carbohydrates remaining in beer into smaller fermentable sugars.
Yeast can then ferment these newly available sugars.
As a result, a beer that appeared to have reached final gravity may begin fermenting again after dry hopping.
This phenomenon is known as:
hop creep.
What Can Hop Creep Cause?
Hop creep can lead to:
- lower final gravity;
- additional alcohol production;
- renewed CO₂ production;
- increased pressure;
- overcarbonation;
- excess carbonation in bottles;
- renewed diacetyl formation;
- longer conditioning time.
This is especially important when packaging beer shortly after dry hopping.
If fermentation restarts and the beer is packaged before it becomes stable again, problems can occur.
Dry Hopping and Diacetyl
Hop creep can indirectly cause another problem:
diacetyl.
When renewed fermentation begins, yeast metabolism may again produce compounds that lead to diacetyl.
If the beer is cooled or packaged too quickly, the yeast may not have enough time to clean it up.
Therefore, after a substantial dry hop, especially at fermentation temperature, it can be wise to allow the yeast enough time to finish any renewed activity.
Do not assume the beer is ready for packaging simply because it had reached final gravity before the dry hop.
Check Gravity After Dry Hopping
For heavily dry-hopped beers, it is good practice to verify that gravity is stable before packaging.
This is especially important for:
- bottle-conditioned beer;
- heavily dry-hopped IPA;
- beers with high dry-hop rates;
- beers showing renewed fermentation activity.
A hydrometer or correctly interpreted refractometer reading is more reliable than airlock activity alone.
The airlock is not a gravity meter.
Oxygen: The Biggest Enemy of Dry-Hopped Beer
Dry-hopped beer is particularly vulnerable to oxidation.
This is one of the most important practical issues in modern hop-forward brewing.
Oxygen can rapidly damage hop aroma.
Instead of bright:
citrus
tropical fruit
fresh hops
the beer can develop:
- muted aroma;
- dull flavor;
- darker color;
- brown or gray tones;
- stale character;
- sweet or honey-like oxidation notes;
- reduced hop intensity.
In heavily hopped beer, oxidation can become obvious surprisingly quickly.
Why Dry Hopping Can Introduce Oxygen
Every time you open a fermenter, air can enter.
Adding hops can disturb the CO₂-rich headspace.
Hop pellets themselves also carry some air between and around them.
If the fermenter is opened repeatedly for multiple additions, oxygen exposure can accumulate.
This is why oxygen control is one of the most important improvements a homebrewer can make when producing modern IPA.
Closed Dry Hopping
A closed dry-hop process attempts to add hops while minimizing contact with outside air.
There are several possible systems.
Pressure-capable fermenters may allow hops to be introduced through:
- a purged hop chamber;
- a dry-hop device;
- a butterfly valve system;
- a purged secondary vessel.
The exact equipment is less important than the principle:
Introduce the hops while introducing as little oxygen as reasonably possible.
Purging With CO₂
CO₂ can be used to reduce oxygen exposure.
For example, a brewer may:
- purge a hop addition vessel;
- purge the fermenter headspace after adding hops;
- perform a closed transfer after dry hopping;
- purge the receiving keg before transfer.
A completely oxygen-free process is difficult at home.
But reducing oxygen exposure can make a dramatic difference.
Do Not Splash the Beer
After fermentation, avoid unnecessary splashing.
Do not aggressively stir dry hops into finished beer.
Hop pellets usually break apart and disperse without vigorous mixing.
If circulation or agitation is used, it should be done in a controlled way that does not introduce air.
On the cold side:
oxygen control is usually more important than aggressive mixing.
Should Dry Hops Be Put in a Bag?
Both loose dry hopping and hop bags can work.
Loose Hops
Advantages:
- excellent contact with beer;
- easy pellet dispersion.
Disadvantages:
- more sediment;
- possible transfer blockage;
- more beer loss.
Hop Bag or Mesh Container
Advantages:
- easier removal;
- reduced loose hop material.
Disadvantages:
- restricted extraction if packed too tightly;
- the hops may not fully expand;
- sanitation and oxygen exposure during removal can become issues.
If using a bag, give the hops enough room to expand.
Do not compress 200 g of pellets into a tiny bag.
Do You Need to Remove the Hops?
Not necessarily.
In many fermenters, loose hop material settles during cold crashing.
The beer can then be transferred away from the sediment.
This means you do not physically need to remove the hops from the fermenter.
Instead:
remove the beer from the hops.
This is often easier and introduces less oxygen.
When Should the Beer Be Removed From the Dry Hops?
For many modern ales, a useful process is:
add dry hops → 48–72 hours contact → cold crash → transfer
This limits unnecessary contact while allowing strong extraction.
If you use a removable hop container, it can theoretically be removed earlier.
But opening the fermenter to remove it may introduce more oxygen than simply leaving it in place until transfer.
The process should therefore be designed around oxygen control, not merely around physically removing the hops.
Cold Crashing After Dry Hopping
Cold crashing helps:
- settle hop particles;
- settle yeast;
- clarify beer;
- make transfer easier.
A typical sequence might be:
Dry hop 48 hours → cool to 2–4°C → hold 1–3 days → transfer
However, cooling a sealed fermenter can create negative pressure as gas contracts.
If outside air is pulled into the fermenter during cold crash, oxidation can occur.
Pressure-capable fermenters or CO₂-fed systems can help prevent this.
Dry Hopping Under Pressure
Pressure-capable fermenters make oxygen management easier.
The beer can remain under light CO₂ pressure during or after fermentation.
Hops can be added with minimal air exposure if the system is designed for it.
After dry hopping and cold crashing, the beer can be transferred under pressure into a purged keg.
This creates a nearly closed cold-side process:
fermentation → dry hop → cold crash → closed transfer → keg
For hop-forward beer, this can significantly improve aroma stability.
Can You Dry Hop in the Keg?
Yes.
Some brewers add hops directly to the serving keg.
This can create strong aroma, but it requires careful management.
Potential issues include:
- very long contact time;
- grassy or vegetal character;
- blocked dip tubes;
- hop particles in the beer;
- continued hop creep;
- inconsistent aroma over time.
A floating dip tube or suitable filter can help.
But keg hopping is a separate process choice rather than automatically a better dry-hop method.
Dry Hopping and Pressure
If dry hopping occurs while fermentation is still active or if hop creep begins, pressure can rise in a sealed fermenter.
A pressure-capable vessel must therefore be used correctly.
A spunding valve can help regulate pressure.
Never assume fermentation is completely finished simply because gravity was stable before adding hops.
Dry hopping can change that.
Choosing Dry-Hop Varieties
Dry hopping emphasizes aromatic hop character, so varieties with desirable aroma profiles are often chosen.
Examples include:
Citra — citrus, tropical fruit
Mosaic — tropical, berry, citrus, complex fruit
Nelson Sauvin — white wine, gooseberry, tropical character
Galaxy — passion fruit, citrus, tropical fruit
Nectaron — peach, passion fruit, citrus, tropical fruit
Amarillo — orange, citrus, floral
Centennial — citrus, floral, resin
Cascade — grapefruit, floral, classic American citrus
Simcoe — pine, citrus, resin, fruit
But dry hopping is not limited to modern American or Southern Hemisphere varieties.
English and European hops can also be dry hopped when appropriate to the beer.
The important question is not:
“Is this a dry-hop variety?”
but:
“Do I want this hop’s aromatic character in the finished beer?”
Single-Hop vs Multi-Hop Dry Hopping
A single hop can create a clear and focused aroma.
For example:
Citra — 5 g/L
This can also help the brewer learn the variety.
Multiple hops can build more complex aroma.
For example:
Citra + Centennial + Cascade
or
Citra + Mosaic + Nelson Sauvin
The combination should have a purpose.
Three hops are not automatically better than one.
A well-designed single-hop beer can be more expressive than a confused mixture of five varieties.
A Practical Pale Ale Dry Hop
For a 25-liter American Pale Ale:
Total dry hop: 75–125 g
or approximately:
3–5 g/L
A simple example:
Citra 50 g + Centennial 30 g + Cascade 20 g
Total:
100 g / 25 L = 4 g/L
Add near or after the end of fermentation.
Contact:
48 hours
Then cold crash and transfer.
This can provide strong aroma without requiring an extreme hop load.
A Practical West Coast IPA Dry Hop
For a 25-liter West Coast IPA:
5–8 g/L
might be a useful range depending on the recipe.
For example:
Citra 80 g
Centennial 50 g
Chinook 30 g
Total:
160 g
In 25 liters:
6.4 g/L
A 48–72 hour contact period can provide intense hop character.
Oxygen control is critical.
A Practical Hazy IPA Dry Hop
Modern Hazy IPA may use significantly larger dry-hop rates.
For example:
8–12 g/L
or sometimes more.
A 25-liter batch at 10 g/L would contain:
250 g dry hops.
At this level, the brewer should expect:
- significant beer loss;
- large hop sediment;
- increased hop creep risk;
- stronger polyphenol extraction;
- greater oxygen sensitivity.
A huge hop charge requires good process control.
Simply adding more hops is not enough.
Should You Split a 10 g/L Dry Hop?
You could use:
5 g/L during late fermentation
plus
5 g/L after fermentation.
This may create different layers of hop expression.
But you could also add:
10 g/L once
under controlled low-oxygen conditions.
Neither method is automatically superior.
If splitting the addition doubles your oxygen exposure, the theoretical aroma advantage may disappear quickly through oxidation.
Process quality matters more than fashionable terminology.
Common Dry-Hopping Mistakes
1. Using Too Much Hop Without a Reason
Large dry-hop rates increase cost, beer loss and process difficulty.
More is not always better.
2. Leaving Hops in the Beer for Too Long
Very long contact may provide little additional aroma while increasing vegetal or polyphenolic character.
3. Ignoring Oxygen
This can destroy the aroma you worked to create.
4. Opening the Fermenter Repeatedly
Every opening creates another opportunity for oxygen exposure.
5. Packaging Immediately After a Large Dry Hop
Hop creep may restart fermentation.
6. Ignoring Gravity After Dry Hopping
Stable gravity before dry hopping does not guarantee stable gravity afterward.
7. Cold Crashing While Sucking Air Into the Fermenter
Cooling contracts the gas in the headspace and can pull air inward.
8. Assuming Two Dry-Hop Additions Are Always Better Than One
More process steps also mean more opportunities for mistakes.
9. Packing Hops Too Tightly Into a Bag or Basket
Poor beer–hop contact can reduce extraction.
10. Aggressively Stirring Finished Beer
You may introduce more oxygen than aroma.
A Simple Dry-Hop Workflow
A practical homebrew process might look like this:
1. Ferment Normally
Allow the beer to approach final gravity.
2. Prepare the Dry Hop
Calculate the amount in g/L.
3. Add the Hops With Minimal Oxygen Exposure
Avoid unnecessary opening and splashing.
4. Maintain the Chosen Temperature
For example:
18–20°C
or a cooler post-fermentation temperature if that is part of your process.
5. Allow 48 Hours of Contact
This is a useful starting point for many ales.
6. Check Fermentation Stability When Necessary
Especially after large dry-hop additions.
7. Cold Crash
For example:
2–4°C for 1–3 days.
Protect the fermenter from oxygen ingress.
8. Transfer
Preferably:
closed transfer into a CO₂-purged keg.
This process is simple, repeatable and protects the aroma you created.
Dry Hopping Is a Balance
The objective is not simply to extract the maximum possible amount of material from the hops.
Good dry hopping balances:
aroma intensity
freshness
beer loss
contact time
hop creep
polyphenol extraction
oxygen exposure
and
process simplicity.
The best dry-hop schedule is therefore not necessarily the one with the most hops or the most additions.
It is the one that produces the desired aroma while protecting the beer.
Keep Brewing Notes
Record:
Hop variety
Hop amount
Beer volume
g/L
Day of addition
Gravity at addition
Beer temperature
Contact time
Single or multiple additions
Gravity after dry hopping
Cold-crash schedule
Packaging method
And most importantly:
How did the finished beer smell and taste?
After several batches, these records become extremely valuable.
You may discover that your preferred Pale Ale needs only 4 g/L.
Your West Coast IPA may work best at 6–7 g/L.
Your Hazy IPA may benefit from 9 g/L rather than 12 g/L.
That knowledge is more useful than simply copying the largest dry-hop number you find in another recipe.
Final Thoughts
Dry hopping is one of the defining techniques of modern hop-forward brewing.
But successful dry hopping is not simply about throwing hops into a fermenter.
The brewer must decide:
how much
when
at what temperature
for how long
and
how to protect the beer from oxygen.
For many homebrewers, a useful starting point is surprisingly simple:
Choose an appropriate g/L rate.
Add the hops near or after the end of fermentation.
Give them approximately 48–72 hours of contact.
Avoid unnecessary oxygen exposure.
Check that fermentation is stable after heavy dry hopping.
Cold crash and transfer with as little oxygen exposure as possible.
From there, adjust the process according to the beer.
A Pale Ale does not need the same dry-hop rate as a Hazy IPA.
A West Coast IPA does not necessarily need the same timing as a beer designed around yeast–hop interaction.
And a 12 g/L dry hop is not automatically better than 6 g/L.
Do not judge a dry-hop schedule by how many grams of hops it contains. Judge it by how much fresh hop character reaches the glass.
That is the real purpose of dry hopping.