I know there are some people who want to learn how to tattoo or envision their future as a tattoo artist, opening their own studio, and turning their hobby into a profession. However, they feel this would be a very difficult path and have no idea how to start on this career. The fear of never being able to tattoo keeps them from even daring to venture into this profession.
In this century, when there are tutorial videos for everything that we can learn from, it’s not hard to start. When I was learning, these platforms didn’t exist yet, it was hard to acquire tattooing equipment, and everything had to be figured out alone. The few tattooed individuals who had been in the business for a few years didn’t easily share the secrets of tattooing. So it was difficult, and even harder to develop.
Now, when everything is accessible with a click of a computer, when there are specialized webshops, and hundreds of videos are available on online platforms, you can learn and improve quickly.
Above all, your development in this profession will be determined by your drawing skills. You can tattoo anything; there are many simple designs, and people tend to choose something simple. However, you won’t progress with these. There is a demand for more complex tattoos, which allow you to challenge yourself; the sky is the limit, bounded only by your imagination. That’s why you need good ideas and drawing skills. But, as I mentioned, many templates can also be applied mechanically to the skin, you just have to tattoo over them, and the tattoo is done.

First Steps:
To try yourself out, it’s not a very costly investment, and if you get bored after the 20th attempt, or you don’t like the profession, or you don’t progress as planned, you can sell your tattooing equipment with a slight loss. You will find a buyer for it.
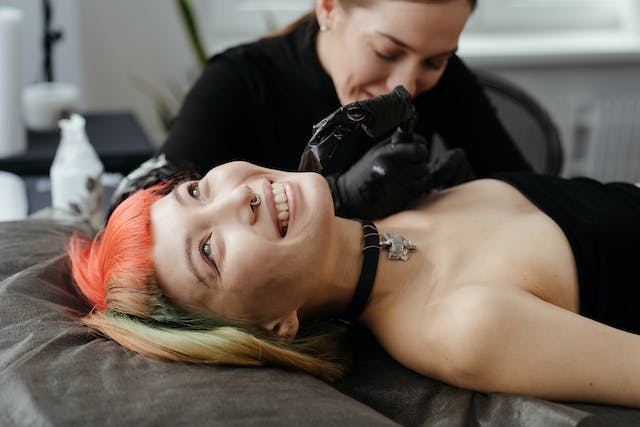
To start, I recommend ordering a medium-quality tattoo kit or a better-quality tattoo pen that you can use for a longer time from a tattoo shop or webshop. It is recommended that it be new, because an older coil tattoo machine might have a weak spring, and you won’t be able to get the power out of it that leads to quality, and you will become convinced that this profession is not for you.
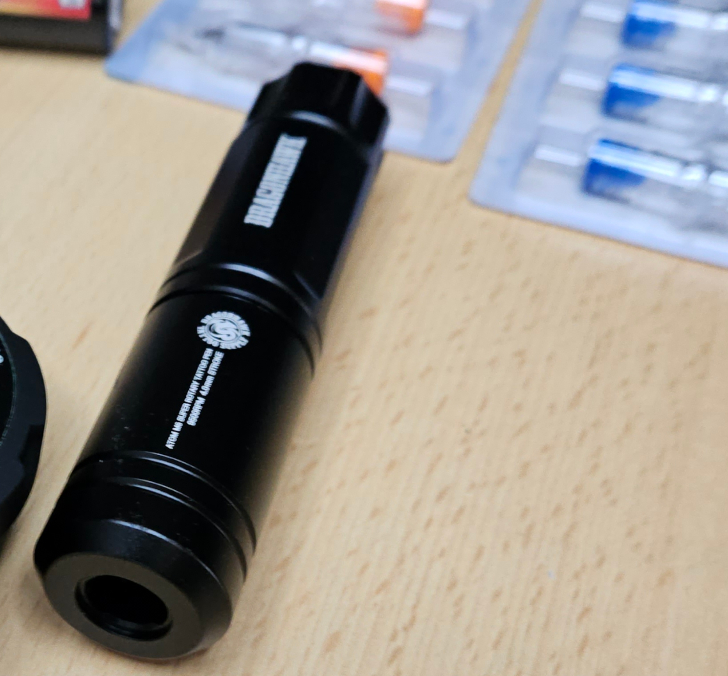
The difference between a coil tattoo machine and a PEN is that the former operates on an electromagnetic basis, while the Pen uses a rotary motor. Of course, there are also rotary motor tattoo machines (not PENs), but you should only buy a very good quality one, because cheap rotary machines are generally quite weak. The pen is called a pen because it looks like a pen or ballpoint pen, just with a thicker diameter. The advantage of coil machines is that the needles are cheaper, while needle cartridges for the PEN are more expensive, but you can achieve better quality with it, and it is easier to maneuver. Both do their job, so they are perfect for beginners. In fact, they still work well for advanced artists too. Of course, if you grow to love the profession, you will switch to the highest quality products because it’s worth it.
As much as possible, order a good quality black ink that is also suitable for human skin. Usually, the cheaper kits come with small Chinese inks that should not be tattooed into human skin. However, they are perfect for practicing on practice skin.
The needles are divided into several categories, just as you see there are several categories of tattoos. Some people only tattoo with a 3RL liner needle and solve everything, but categorized: liner RL, shader or coloring M1 (magnum-flat, comb-type needle) and RS, this is a round shader or pusher needle, many people like it for fills or colors, but many only use the magnum/flat type. You have to try all the techniques and needles that exist, and you will see what works for you, with what you progress more beautifully and faster. The needle category is indicated on the back of the packaging, as well as the size. Of course, if you don’t understand something, feel free to ask, I strive to explain everything, but there are a lot of things, and I’m trying not to confuse you but to talk about the basics.
You need to acquire some practice skins to practice on. A stencil oil or cream, which helps transfer the design onto the skin or practice skin. A specialized spirit paper (indigó). I would suggest buying a stencil printer, but it’s expensive, and you don’t even know how much you’ll like this profession yet. But it will be worth getting one over time because it will help a lot. You won’t have to trace the template by hand.
How to make the stencil:
There are many videos on this topic on social media, and they clearly show how easy it is to prepare the design and how simple it is to tattoo. Some designs don’t even require drawing skills, you just have to follow the lines, then fill or shade, and the tattoo is done.
To prepare the stencil, you will need a printer or the printed drawing, a specialized tattoo spirit paper, and a stencil oil or stencil cream.
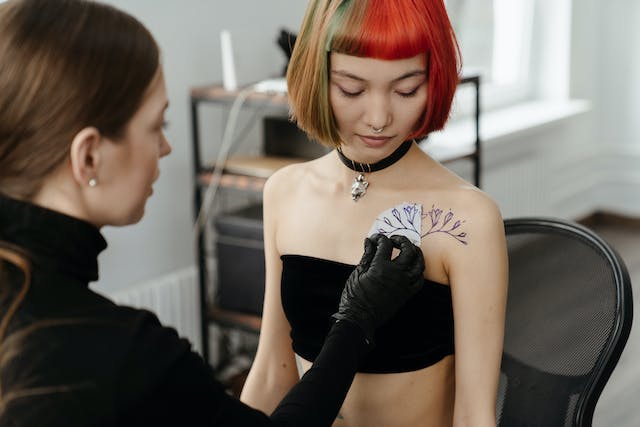
First of all, you will need any printer, or have the design printed somewhere in the appropriate size on an A4 sheet. The spirit paper consists of 4 parts. Remove the back two sheets, leaving only the spirit paper and its front sheet. Place the printed design sheet onto the spirit paper and trace the outlines and those details that will help you identify and execute the details of your tattoo with a ballpoint pen. The ink sticks to the back of the design, and the stencil is ready. It’s that simple. I will try to link a video later. You cut around the stencil, disinfect the skin or wipe the practice skin with alcohol, and blot it dry after a few seconds.
You apply the stencil oil, so that it is neither too wet nor too dry, then you practice and figure out how much to put on. If it’s too much, the design will bleed, if it’s too little, it won’t stay on. Now you place the stencil on the prepared skin and smooth it nicely everywhere, then leave it for about 10-15 seconds. Then you remove it, and as you can see, the design has remained, in a beautiful indigo blue on the skin. Always make sure it is placed in the right spot and is not crooked, or too much on one side and barely visible on the other. If you put it wrong, you get angry, mark dots with a marker, reapply until it looks good, both up close and from afar. And always ask the client too, and have them look in the mirror, and if they also say it’s good, only then start tattooing. The stencil can be wiped off, the tattoo cannot! Always keep this in mind. Remember this advice well, let it come to mind even in your sleep. Because if a tattoo goes wrong, you will dream and regret at night that you messed it up!
Well, we are more or less done so far.
Let’s talk about some basic supplies:
Tattoo machine, ink, needles are accounted for. The necessary materials for the stencil are accounted for.
Next, you need a skin disinfectant. I don’t know what to recommend, check what they use near you, I use Kodan Forte, it has worked for me for years.
You need a green soap. I use a concentrate, 1 part green soap, 15-20 parts distilled water. I put this in a squeeze bottle, and I use it to wash the tattoo during work. Other solutions exist; I use others too, but I’m not promoting anyone, as I am writing this voluntarily, honestly, and it’s not a sponsored article. You need to look around the shop to see what’s available.
You need a good ointment, let’s say Tattoo Ointment, but others suitable for this purpose exist. So, at the end of the tattoo, you wash the surface nicely, until clean. It dries a little, you blot the water, and thinly apply the ointment to the tattoo, then put on a film/wrap, which should be kept there for a few hours. And, of course, the tattoo will have to be constantly re-oiled. Special films exist, which I also use; I wash the tattoo nicely, as soon as it dries, I put on a very small amount of ointment and wrap it, and leave it for a few days, and it heals more beautifully. I will write more about this later.
If tattooing takes off nicely, don’t just spend the money, always put a few percent into a small box, then dedicate it to acquiring supplies. Say, an armrest, special shading inks, colors, and then over time, a better machine.
I wish you good luck, if you have any questions, write to me, and I will try to give an appropriate answer.
Titles for the text:
“Tattooing for Beginners: How to Make the Stencil and Start on the Path of Tattoo Art” “Step-by-Step in the World of Tattooing: Stencil Making and Basics” “Guide for Tattoo Beginners: Stencil Making and Essential Supplies”
The following is a separate list, likely instructions for someone getting a tattoo, not for becoming an artist, so I’ve separated it but still translated it:
- Research and inspiration:
- Browse the work of tattoo artists online and offline.
- Gather inspiration regarding styles, themes, and concepts.
- Decide on the style and theme:
- Determine what style and theme you want your tattoo to be in.
- Consider whether your tattoo should carry a unique meaning.
- Find a good tattoo artist:
- Search among local or international tattoo artists.
- Look at portfolios and choose the one who best fits your ideas.
- Consultation with the tattoo artist:
- Arrange a meeting with the chosen artist.
- Talk about your ideas, ask about possibilities and prices.
- Important considerations:
- Make sure the tattoo artist is certified and works according to health regulations.
- Understand the importance of aftercare and follow the instructions.
- Prepare for the pain:
- Tattooing can be painful, so prepare mentally and physically.
- Expect to avoid sun exposure for a while after the tattoo.
- Keep in touch with the artist:
- Communicate with the tattoo artist during the design process.
- Don’t be afraid to ask questions and emphasize the elements that are important to you.
- Respect the artist:
- Trust the artist and allow them to express their creativity.
- Don’t hesitate to share your feedback, but respect their professional experience.
- Capture the moment:
- Capture the finished state of your tattoo and share it with the artist if they would also appreciate it.
- Care and healing:
- Follow the instructions regarding tattoo aftercare.
- Be patient and do not rush the healing process.