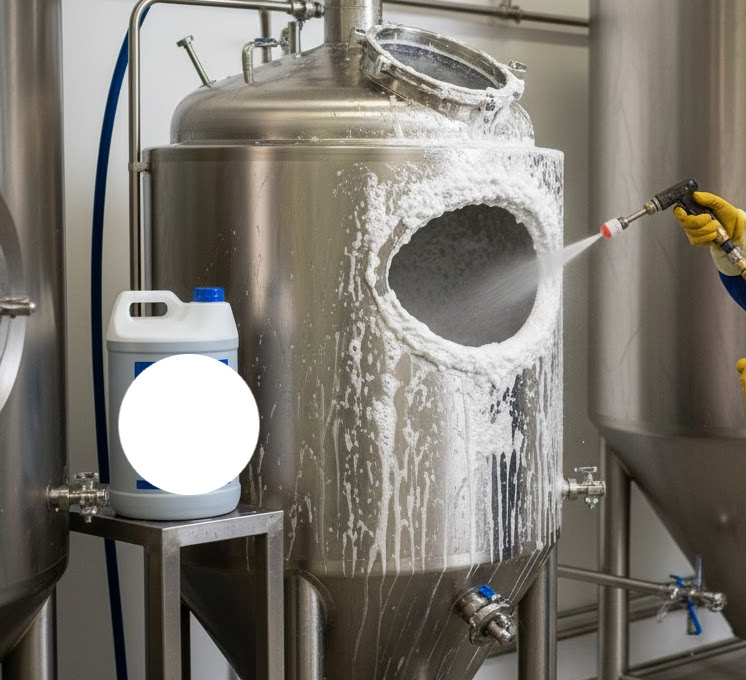
Good beer begins long before fermentation. It begins with clean equipment.
You can have an excellent recipe, fresh malt, expensive hops and healthy yeast, but if unwanted microorganisms find their way into the beer after the boil, all that work can be ruined.
Cleaning and sanitizing are therefore not optional extras in homebrewing. They are part of the brewing process itself.
The good news is that maintaining good brewing hygiene is not complicated once you understand one fundamental distinction:
Cleaning removes dirt. Sanitizing reduces microorganisms to a safe level.
You need both.
Why Is Hygiene So Important in Homebrewing?
During the boil, wort is exposed to temperatures that destroy most microorganisms that could cause problems.
The situation changes as soon as the wort begins to cool.
From this point onward, anything that touches the wort or beer can potentially introduce unwanted microorganisms: fermenters, hoses, valves, siphons, hydrometers, spoons, keg fittings, bottles and even your hands.
Wild yeasts and bacteria are invisible. A fermenter may look perfectly clean and still contain microorganisms capable of affecting the beer.
This is why I consider everything that touches cooled wort or fermented beer to be part of the sanitary side of the brewery.
Cleaning and Sanitizing Are Not the Same Thing
This distinction is probably the most important lesson in brewing hygiene.
Cleaning
Cleaning physically and chemically removes material such as:
- dried wort and sugars
- yeast deposits
- proteins
- hop material and resins
- beer stone and mineral deposits
- dirt and other visible residues
A cleaner is designed primarily to remove contamination from a surface.
Sanitizing
Sanitizing comes afterward.
A brewing sanitizer is used on an already clean surface to reduce microorganisms that could contaminate the beer.
This leads to one of the most important rules in homebrewing:
You cannot effectively sanitize dirty equipment.
If dried yeast or organic material remains inside a valve, hose or fermenter, simply spraying sanitizer over it is not a substitute for cleaning.
First clean. Then rinse when the cleaner requires it. Then sanitize.
When Does Equipment Need to Be Sanitized?
Not every piece of brewing equipment needs the same treatment.
Equipment used before or during the boil does not generally require the same sanitation regime because the wort will subsequently be boiled.
Once the wort has cooled, however, the rules change.
Anything that touches the beer from that point onward should be properly cleaned and sanitized.
Typical examples include:
Fermenters, lids, airlocks, transfer hoses, siphons, sampling equipment, valves, keg components, liquid lines, taps, bottles and bottling equipment.
This simple division between the hot side and cold side makes brewing hygiene much easier to understand.
Choosing a Brewing Cleaner
I prefer products intended for brewing rather than strongly perfumed household detergents.
This is particularly important with plastic equipment, where scratches, residues and odors can become troublesome.
Oxygen-Based Cleaners
Products such as Chemipro Oxi and similar oxygen-based cleaners are useful for removing organic residues.
They can be especially convenient for fermenters, bottles and equipment that can be soaked.
But remember:
Cleaning is not automatically the same thing as sanitizing.
This is a mistake I made myself in my earlier brewing years. I used Chemipro Oxi on bottles and assumed that because everything looked extremely clean, an additional sanitation step was unnecessary.
Fortunately, I never had an infection from it, but today I prefer to separate the two jobs.
PBW
PBW – Powdered Brewery Wash – is a purpose-made alkaline brewery cleaner.
It is particularly useful for stubborn organic deposits, dried fermentation residue, proteins and difficult areas that are hard to reach mechanically. Five Star describes PBW as an alkaline cleaner for organic soils and instructs users to rinse equipment after cleaning.
For kegs and fermenters, soaking or circulating an appropriate cleaning solution can reach areas that are difficult to clean with a sponge.
Always follow the concentration, temperature and contact-time instructions for the particular cleaner you are using.
Sanitizers: The Final Step Before Beer Contact
Once the equipment is clean, it can be sanitized.
For homebrewing, no-rinse sanitizers are particularly convenient because they eliminate the need for another water rinse immediately before use.
One of the best-known examples is Star San.
Star San
Star San is a high-foaming, acid-based no-rinse sanitizer. According to Five Star Chemicals, equipment should first be thoroughly cleaned, then exposed to correctly diluted Star San for at least 1–2 minutes. The solution is then drained without rinsing.
The foam is intentional.
It helps the sanitizer reach cracks, corners and other difficult surfaces. Five Star specifically describes the product as self-foaming and suitable for use without rinsing at the recommended dilution.
So there is an old homebrewing saying worth remembering:
Don’t fear the foam.
ChemSan / Chemipro San
In Europe, I have frequently used ChemSan/Chemipro San-type no-rinse sanitizer.
My usual approach is simple: prepare the solution according to the current instructions on the product label, make sure all beer-contact surfaces are completely wetted, allow the required contact time, and then drain.
I do not recommend copying a concentration from an old blog post or another brewer without checking the bottle you actually own. Product formulations and manufacturer instructions can change.
The label should always have the final word.
A Spray Bottle Is One of My Most Useful Brewing Tools
One of the simplest pieces of equipment in my brewery is a spray bottle filled with correctly prepared sanitizer.
During brewing and transfers I use it constantly.
Before attaching a hose – spray.
Before taking a sample – spray.
Before connecting a keg fitting – spray.
Before touching a sanitized connection again – spray.
It is inexpensive, fast and makes good sanitation almost automatic.
There is an important distinction, however: spraying sanitizer onto visible dirt does not clean it. The component must already be clean.
Cleaning Fermenters
A fermenter should be cleaned soon after the beer has been transferred out.
Fresh yeast and fermentation residue are much easier to remove than material that has been allowed to dry for several days.
I wash the vessel thoroughly using an appropriate cleaner and a soft sponge or cloth where necessary.
With plastic fermenters I avoid aggressive abrasive pads. Scratching the internal surface creates small areas that become increasingly difficult to clean properly.
After cleaning, I rinse thoroughly whenever the cleaner requires rinsing.
Before the fermenter is used again, I sanitize all surfaces that may contact the wort or beer – including the lid, seals and valves.
I normally add enough prepared sanitizer to wet the entire interior, close the fermenter and rotate or shake it so that the solution reaches every surface.
Then I drain it.
If I clean a fermenter today but do not use it until weeks later, I still sanitize it again immediately before filling.
Storage does not preserve sanitation indefinitely.
Cleaning and Sanitizing a Keg
Kegs deserve special attention because they contain several areas that are easy to overlook.
The inside of the keg may look spotless while beer residue remains in a dip tube, post, poppet, seal or liquid line.
I therefore treat keg cleaning as a complete system rather than simply washing the stainless-steel container.
After cleaning the keg, I like to push some of the cleaning solution through the liquid side so that the dip tube and liquid path are cleaned as well.
After the required cleaning cycle, everything is properly rinsed.
I then repeat the process with sanitizer before filling the keg.
This allows the sanitizer to contact the keg body, dip tube, posts and liquid path rather than sanitizing only the easily visible surfaces.
For larger systems, this same principle develops into CIP – Cleaning in Place, where cleaning solutions are circulated through tanks, pipes and fittings instead of dismantling the entire system after every use. Professional brewery guidance similarly separates cleaning, rinsing and final sanitation as distinct stages.
Don’t Forget the Small Parts
Small components are often more troublesome than large vessels.
Pay attention to:
valves, taps, O-rings, keg posts, poppets, disconnects, transfer hoses, bottling wands and siphons.
A large stainless-steel keg is relatively easy to inspect.
The inside of a narrow hose is not.
If tubing becomes permanently discolored, scratched, difficult to clean or develops an odor, replacement is often a better solution than trying endlessly to rescue inexpensive old tubing.
My Bottle-Cleaning Routine – and What I Changed
Bottle cleaning was probably the most time-consuming part of my brewing when I bottled most of my beer.
My first priority was always to distinguish between a dirty bottle and a clean bottle that only needed sanitizing.
A bottle containing dried beer, yeast or mold must first be properly cleaned. Sanitizer should never be expected to penetrate visible contamination and somehow make the bottle safe.
In the past I used hot water and a cleaning solution, soaked several bottles at a time, scrubbed stubborn bottles with a bottle brush and rinsed them thoroughly.
I later used Chemipro Oxi as an additional cleaning step.
For quite some time, I believed that a thoroughly cleaned bottle treated with Oxi did not need a separate sanitizer.
I never experienced an obvious infection from this method, but today I would not recommend relying on that assumption.
I now treat cleaning and sanitizing as two separate operations.
Once the bottles are visibly clean and completely free of cleaning-agent residue, I sanitize them immediately before filling.
A Better Way to Sanitize Bottles
You do not need to fill every bottle completely with sanitizer.
The objective is to wet all internal surfaces for the contact time specified by the sanitizer manufacturer.
One practical method is to place a small amount of prepared sanitizer in a clean bottle, shake or rotate it so every internal surface becomes wet, drain it and move on to the next bottle.
A bottle rinser or vinator makes this process even faster.
After sanitizing, I place the bottles upside down on a clean bottle drying rack until I am ready to fill them.
My rack holds roughly 80 bottles, and despite being one of the simplest pieces of equipment I own, it was one of my better bottling purchases.
One Thing I No Longer Do
I used to dislike the foam left by no-rinse sanitizer.
At one point I poured distilled water through the sanitized bottles afterward simply to remove the remaining foam.
Today I would skip that step.
If a sanitizer is specifically designed and labelled for no-rinse use at the correct concentration, rinsing afterward is unnecessary. More importantly, anything introduced after sanitation creates another opportunity for contamination.
With Star San, for example, the manufacturer explicitly instructs users to drain but not rinse after the required contact time.
So today my procedure is simpler:
Clean → rinse the cleaner → sanitize → drain → fill.
Household Detergents: Can They Be Used?
They can sometimes clean brewing equipment, but they are not my first choice.
Perfumed dishwashing liquids may leave aromas or residues, particularly on plastics.
Dishwasher products can also contain ingredients designed for a completely different cleaning environment.
A purpose-made brewery cleaner gives me much better control over concentration, compatibility and rinsing.
If household detergent is used, I would choose an unscented product and rinse extremely thoroughly.
For valuable brewing equipment, however, I prefer a cleaner designed for the job.
Foam, Scratches and the Myth of “Looking Clean”
One of the lessons brewing teaches quickly is that appearance can be deceptive.
A shiny fermenter isn’t necessarily sanitary.
A cloudy old hose may still function, but it becomes increasingly difficult to know what remains inside it.
And a bottle that smells clean may still contain invisible contamination.
Good sanitation therefore isn’t about making equipment look clean.
It is about using a repeatable process.
Chemical Safety Still Matters
Brewing chemicals are useful precisely because they are chemically active.
Concentrated acid sanitizers should be handled carefully. Follow the manufacturer’s instructions, avoid eye and skin contact, use appropriate protection when handling concentrates, and never assume that two different cleaning chemicals can safely be mixed together. Five Star’s Star San safety documentation, for example, calls for suitable gloves and eye/face protection when handling the product.
More chemical is also not necessarily better.
Correct concentration and sufficient contact time are what matter.
My Basic Cleaning and Sanitizing Rule
After years of homebrewing, I have reduced the entire subject to one simple routine:
If it is dirty – clean it.
If cleaner was used – rinse it when required.
If it will touch cooled wort or beer – sanitize it.
Once sanitized – avoid touching it again.
It sounds almost too simple.
But consistent cleaning and sanitation eliminate one of the largest avoidable risks in homebrewing.
I have been fortunate enough never to lose a batch to an obvious infection. Some of that may simply be luck, particularly during my earlier years when my procedures were less rigorous.
Today I prefer not to depend on luck.
A few extra minutes spent cleaning a valve, sanitizing a hose or spraying a connection is a very small price to pay compared with throwing away weeks of work and an entire batch of beer.
Clean first. Sanitize second. Then let the yeast do the rest.
Read this: What You Need for Homebrewing With Minimal Investment