You don’t need an expensive brewery or a room full of professional equipment to start making good beer at home.
At its simplest, homebrewing requires only a few basic tools: something to mash and boil in, a vessel where the beer can ferment, a way to measure what is happening, and equipment that can be properly cleaned and sanitized.
You can start with a simple setup and upgrade it gradually as you gain experience. Understanding what each piece of equipment actually does is much more important than buying everything at once.
Here are the essentials.
1. Fermenter – Where Beer Becomes Beer
After brewing, the cooled wort is transferred into a fermenter and yeast is added. This is where fermentation takes place: the yeast consumes fermentable sugars and produces alcohol, carbon dioxide, and many of the flavor compounds that define the finished beer.
For a typical 25-liter batch, a fermenter of around 30 liters or slightly larger gives the beer enough headspace for foam and active fermentation.
Fermenters can be made from food-grade plastic, PET, glass, or stainless steel. For beginners, a simple food-grade plastic or PET fermenter is inexpensive and perfectly suitable.
Most fermenters use an airlock, which provides a simple route for fermentation gas to escape while helping protect the beer from the outside environment.
More advanced brewers may eventually move to pressure-capable fermenters, conical fermenters, or stainless-steel systems, but none of these are necessary for your first beer.
2. Brewing Kettle – Where the Brewing Begins
If you are brewing from malted grain, you need a vessel large enough to heat water, mash the grain and/or boil the wort.
A traditional setup can use a large pot for the mash and another pot for heating sparge water. Sparging means gently rinsing the grain after mashing to recover more of the sugars that were extracted from the malt.
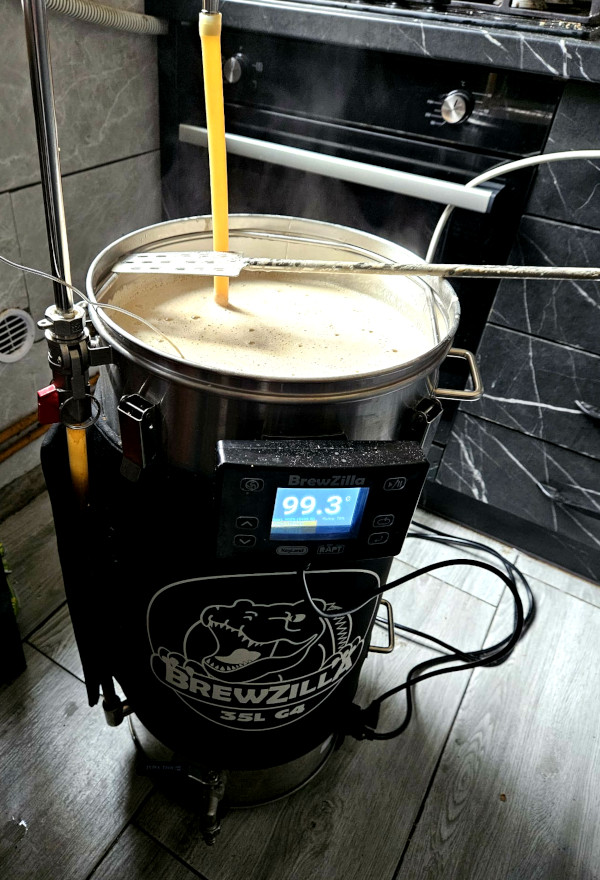
A simpler alternative is an all-in-one electric brewing system, such as a BrewZilla, Grainfather, or similar system. These combine several functions into one unit and usually include a malt pipe or grain basket, heating elements, temperature control and a recirculation pump.
They cost more initially, but can make all-grain brewing much more convenient.
You certainly don’t need one to learn how to brew.
3. Grain Bag, False Bottom and Hop Spider
During all-grain brewing, crushed malt is mixed with warm water during the mash. The enzymes naturally present in the malt convert starches into sugars that the yeast can later ferment.
After the mash, we need to separate the sweet liquid — called wort — from the grain.
A grain bag, malt basket or false bottom makes this possible while allowing the liquid to drain away.
A hop spider performs a different job. It is a fine mesh basket used during the boil to contain hop material.
It can reduce the amount of hop debris entering your fermenter and can make transferring and cleaning easier. It is useful, but certainly not essential — hops can also be added directly to the kettle.
4. Thermometer – Temperature Matters
Temperature is one of the most important variables in brewing.
During mashing, even a few degrees can influence how fermentable the wort becomes and therefore affect the body, sweetness and final gravity of the beer.
A good digital thermometer with a fast-response probe is therefore one of the first tools worth buying.
You’ll also use it when preparing brewing water, cooling wort and checking fermentation conditions.
You don’t need an expensive laboratory thermometer — but you do need one you can trust.
5. Hydrometer or Refractometer – Measuring Your Beer
You cannot reliably judge fermentation just by watching bubbles in an airlock.
A hydrometer measures the density, or specific gravity, of the wort. The reading before fermentation is called Original Gravity (OG), while the final reading is called Final Gravity (FG).
By comparing these values, you can estimate alcohol content and determine whether fermentation has finished.
A refractometer requires only a few drops of liquid and is especially convenient during the brewing process. However, once alcohol is present, its readings require correction.
For a beginner, a traditional hydrometer is inexpensive, simple and extremely useful.
6. Scales – From Kilograms to Fractions of a Gram
You will probably need two different scales.
A normal kitchen scale is useful for weighing kilograms of malt and larger quantities of ingredients.
A small precision scale becomes useful when weighing hops, brewing salts or other ingredients used in very small amounts.
If you eventually begin adjusting your brewing water, a scale capable of accurately measuring around 0.1 g or better is very useful. Extreme laboratory precision is not necessary for most homebrewing.
7. pH Meter – Understanding Your Brewing Water
A pH meter is not absolutely necessary for your first batch, but it becomes extremely useful as you move deeper into all-grain brewing.
Mash pH affects enzyme activity, extraction, flavor and other parts of the brewing process. Water chemistry can also have a surprisingly large influence on how a beer tastes.
A digital pH meter allows you to check your mash and brewing water rather than relying entirely on calculations.
If you buy one, remember that a pH meter also needs proper calibration and storage. A neglected meter can be worse than having no measurement at all.
8. Malt Mill – Crushing Grain Correctly
If you buy whole malt, you need to crush it before mashing.
The purpose of milling is not to turn the malt into flour. Instead, the kernels should be cracked open while much of the husk remains reasonably intact.
The exposed interior allows water and enzymes to work efficiently, while the husks help create a natural filter bed during lautering.
A simple manual two-roller malt mill can serve a homebrewer for many years.
If you don’t own a mill yet, many homebrew suppliers can sell malt already crushed. That makes a mill something you can easily add later.
9. Buckets, Bowls, Tubing and Funnels
These are the boring pieces of equipment that somehow end up being used constantly.
A few food-safe buckets and containers are useful for preparing sanitizer, weighing malt, collecting equipment and washing bottles.
Food-grade silicone tubing is particularly useful for transferring wort or beer without excessive splashing.
Funnels and measuring jugs also become surprisingly important once you start brewing.
They are inexpensive, so having several sizes around makes brew day considerably easier.
10. Bottling Equipment
If you are not kegging your beer, you need somewhere for the finished beer to go.
Reusable beer bottles are perfectly suitable as long as they are designed to withstand carbonation pressure and are free from damage.
You will normally need:
- bottles suitable for carbonated beer
- crown caps
- a bottle capper
- a bottling wand or suitable tubing
- sanitizer
- optionally, a bottle drying tree
Before bottling, a measured quantity of priming sugar is added. The remaining yeast ferments this small amount of sugar inside the sealed bottle, naturally producing the CO₂ that carbonates the beer.
Never guess the amount of priming sugar — calculate it according to beer volume, temperature and desired carbonation.
11. Cleaning and Sanitizing – Probably the Most Important Equipment of All
You can have an expensive brewing system, excellent malt and fresh hops and still make bad beer if your equipment is not clean.
There are actually two different jobs:
Cleaning removes dirt, yeast deposits, proteins and other visible material.
Sanitizing reduces microorganisms on already-clean surfaces that will come into contact with cooled wort or finished beer.
Products such as Star San/ChemSan are commonly used as no-rinse sanitizers when mixed according to their instructions. Cleaning products and sanitizers are not necessarily interchangeable, so always follow the manufacturer’s directions.
Brushes, cleaning cloths, spray bottles and suitable protective equipment are inexpensive investments that you will use constantly.
One of the most important rules in homebrewing is simple:
Anything that touches the wort after it has cooled should be properly cleaned and sanitized.
12. Wort Chiller – Cooling After the Boil
When the boil is finished, the hot wort needs to be cooled before yeast can be pitched.
An immersion chiller is one of the simplest solutions. Cold water passes through a metal coil submerged in the hot wort and carries heat away.
Counterflow chillers and plate heat exchangers can cool wort even more efficiently, although they require more attention to cleaning.
You can brew without a dedicated chiller using other appropriate cooling methods, but for regular brewing, a wort chiller is one of the upgrades I would consider very early.
13. Kegging and CO₂ – An Alternative to Bottles
Bottling works perfectly well, but eventually many homebrewers move to kegs.
A basic kegging system normally consists of a pressure-rated keg, CO₂ cylinder, regulator, gas and beer lines, connectors and a tap.
Instead of waiting for priming sugar to naturally carbonate every bottle, CO₂ can be used to carbonate and dispense the beer directly from the keg.
It costs considerably more than basic bottling equipment, so it certainly isn’t necessary for a beginner.
But once you start kegging, going back to washing dozens of bottles can be difficult. 🙂
14. Reverse Osmosis Water – For Advanced Water Control
Beer is mostly water, and the mineral composition of that water affects the finished beer.
A reverse osmosis (RO) system removes most dissolved minerals from the source water, giving the brewer a relatively neutral starting point. Minerals such as calcium, chloride and sulfate can then be added in controlled amounts according to the beer being brewed.
This is an advanced step rather than beginner equipment.
Start by learning your local water. Later, if you become interested in brewing water chemistry, RO water gives you enormous control.
15. Keep a Brewing Log
This costs almost nothing and may become one of your most valuable brewing tools.
Write down what you did.
Record your malt and hops, yeast, water additions, mash temperature, mash pH, boil additions, OG, fermentation temperature, FG and anything unusual that happened.
Most importantly, write down how the beer tasted.
If a beer turns out fantastic, your notes tell you how to make it again.
If something goes wrong, those same notes can help you discover why.
You Don’t Need Everything at Once
It is very easy to enter the world of homebrewing and suddenly believe you need pumps, stainless-steel fermenters, pressure-transfer equipment, electronic hydrometers, RO systems and a refrigerator full of kegs.
You don’t.
Start with the equipment required to brew, ferment, measure, clean and package your beer safely.
Then brew.
Every batch will teach you something. Over time you will discover which equipment actually improves your brewing process and which gadgets you simply don’t need.
That is part of the fun of homebrewing.
A simple pot and fermenter can teach you more about making beer than an expensive brewing system that you don’t yet understand.
And somewhere along the way, your collection of “just a few essential brewing tools” will probably take over half the house anyway. 🍺