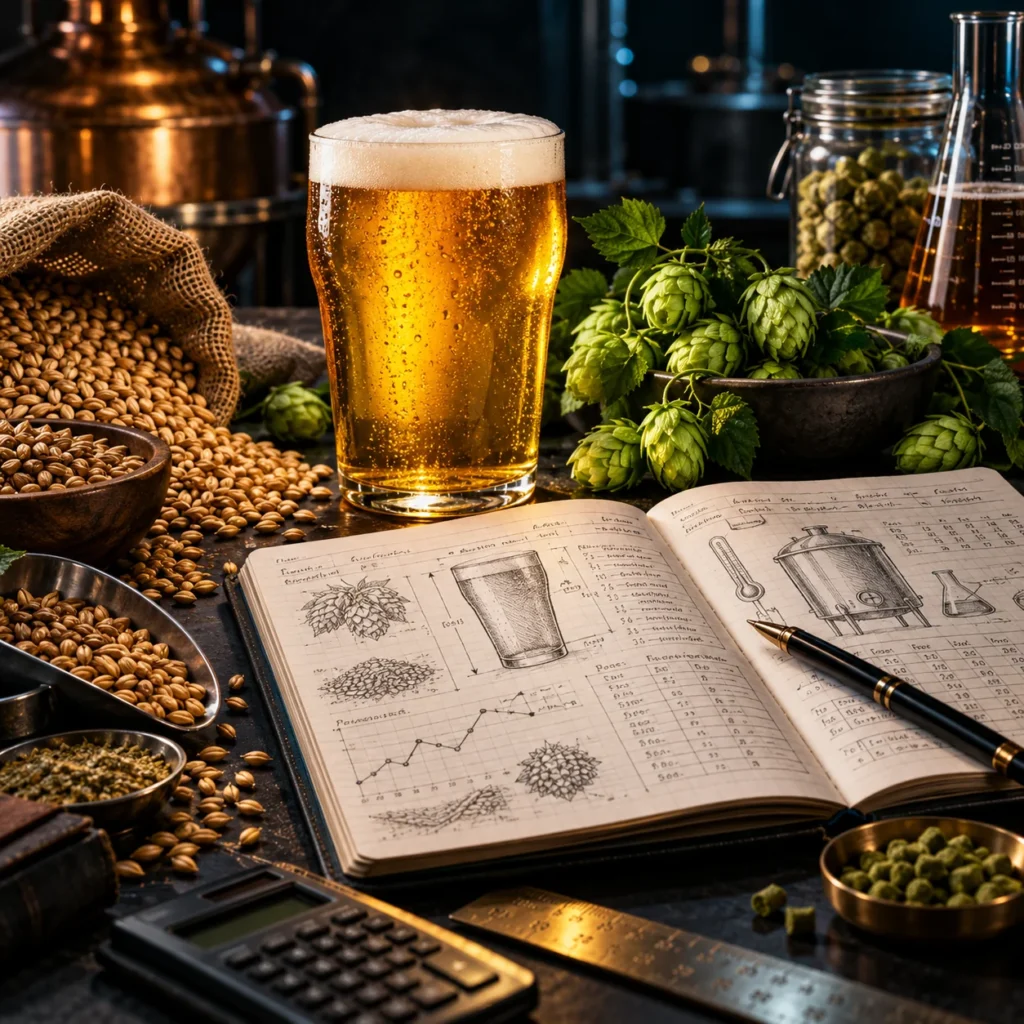
Learning how to design a beer recipe from scratch begins with a clear vision of the finished beer — not simply a list of ingredients. Before choosing malts, hops, or yeast, you need to understand what your beer should taste, smell, and feel like.
Many homebrewers approach recipe creation by selecting their favorite malts, adding a few interesting hop varieties, choosing an available yeast, and hoping that the ingredients will work together.
Sometimes they do. But consistently good beer requires a more deliberate approach.
Beer recipe design is the process of turning a desired drinking experience into measurable brewing targets, ingredient quantities, and a practical brewing plan.
It involves much more than calculating alcohol content or choosing the right hops. A well-designed recipe must consider how malt character, bitterness, fermentation, body, water chemistry, and brewing equipment interact.
A beer can have the perfect malt bill on paper and still finish too sweet. It can contain excellent aroma hops but lack balance. It can hit its original gravity precisely and still taste completely different from what the brewer intended.
The solution is to design the beer as a complete system rather than a collection of separate ingredients.
In this guide, we will build an original beer recipe from scratch, using a 25-liter (6.6 US gallon) American Pale Ale as our practical example.
You will learn how to:
- Define the sensory character of your beer before choosing ingredients.
- Translate that idea into OG, FG, ABV, IBU, color, and body targets.
- Estimate the grain quantity required for your brewing efficiency.
- Coordinate malts, hops, yeast, and mash temperature.
- Design water volumes and account for brewing losses.
- Evaluate whether the recipe is realistic before brew day.
- Record and improve the recipe after tasting the finished beer.
The goal is not simply to follow a recipe.
The goal is to understand why the recipe works — and how to design your own.
1. Start With the Finished Beer, Not the Ingredients
Before opening brewing software or weighing malt, imagine the beer in your glass.
What should its first impression be?
Should it be crisp and refreshing, with a clean finish? Soft and fruity, with restrained bitterness? Rich and malty, with a rounded body? Or dry, assertively bitter, and intensely aromatic?
These questions may sound subjective, but they determine almost every technical decision that follows.
Consider three very different brewing goals.
A traditional Pilsner needs a relatively delicate malt foundation, restrained fermentation character, appropriate bitterness, and a clean, dry-to-balanced finish.
A modern Hazy IPA often relies on expressive hop aroma, a soft mouthfeel, carefully controlled bitterness, and an appropriate yeast character.
An Irish Dry Stout depends on its balance of roasted grain character, bitterness, body, and dryness rather than excessive sweetness or aggressive burnt flavors.
All three can be brewed successfully using similar basic equipment, but their recipes require completely different decisions.
Define your beer in one sentence
Try writing a short description before creating the recipe.
For our example:
A refreshing, golden American Pale Ale with noticeable citrus and floral hop aroma, firm but smooth bitterness, moderate body, and a clean, moderately dry finish.
This sentence becomes the foundation of the recipe.
It already tells us several important things:
- The malt should support the beer without becoming excessively sweet.
- The hop schedule should provide both bitterness and noticeable aroma.
- The yeast should remain relatively neutral.
- The mash should encourage sufficient fermentability.
- The beer should finish clean rather than heavy.
- The final alcohol content should remain moderate enough for easy drinking.
If an ingredient or brewing step does not contribute to that goal, it may not be necessary.
Create a sensory hierarchy
A useful technique is to rank the most important characteristics of your future beer.
For this Pale Ale, our priorities are:
1. Clean drinkability → 2. Citrus and floral hops → 3. Balanced bitterness → 4. Supporting malt character → 5. Moderate body
This hierarchy will help us make decisions later.
For example, if adding more specialty malt would create a sweeter, heavier beer, we should question that addition rather than automatically increasing the grain bill’s complexity.
A beer recipe becomes easier to design when every ingredient has a defined purpose.
2. Translate Your Idea Into Brewing Targets
Now we can turn our sensory description into numbers.
A brewing target is not a guarantee. It is a measurable objective that helps you evaluate whether the recipe is likely to produce the beer you want.
The most important starting parameters are:
Original Gravity (OG): The density of the wort before fermentation. It provides an indication of the dissolved extract available to the yeast.
Final Gravity (FG): The measured density after fermentation, commonly used with OG to estimate alcohol content and apparent attenuation.
Alcohol by Volume (ABV): The estimated percentage of alcohol in the finished beer.
International Bitterness Units (IBU): A measure related to bittering compounds in beer. It is useful for recipe calculations, although perceived bitterness also depends on sweetness, mineral balance, pH, and other factors.
Beer Color (EBC or SRM): A numerical description of beer color.
Apparent Attenuation: The percentage reduction in gravity points during fermentation. It is influenced by the yeast, wort composition, fermentation conditions, and measurement method.
These values interact. They should not be selected independently.
Our American Pale Ale targets
The following table defines our planned recipe, with BJCP American Pale Ale reference ranges for comparison.
The Recipe Design Process
Worked Example / American Pale Ale
Our Recipe Targets
Planned values for 25 L (6.6 US gal) transferred into the fermenter.
| Parameter | Our Target | BJCP 18B Range |
|---|---|---|
| Original Gravity | 1.052 | 1.045–1.060 |
| Final Gravity | 1.011 | 1.010–1.015 |
| Alcohol | Approximately 5.4% ABV | 4.5–6.2% |
| Bitterness | Approximately 35 IBU | 30–50 IBU |
| Color | 10–14 EBC / approximately 5–7 SRM | 5–10 SRM |
| Apparent Attenuation | Approximately 79% | No fixed BJCP range |
| Batch Size | 25 L / 6.6 US gal | Not specified |
Make the numbers work together
Our target OG is 1.052, which means the original wort has 52 gravity points above water.
If the beer finishes at 1.011, it has 11 remaining gravity points.
A common homebrewing approximation for alcohol content is:
ABV (%) ≈ (OG − FG) × 131.25
For our example:
(1.052 − 1.011) × 131.25 = approximately 5.38% ABV.
The planned apparent attenuation is:
Apparent attenuation (%) = (OG points − FG points) ÷ OG points × 100
(52 − 11) ÷ 52 × 100 = approximately 78.8%.
These calculations give us a useful starting point, but the predicted FG will depend on wort fermentability, yeast performance, and fermentation conditions.
Understanding bitterness relative to gravity
A useful comparison is the BU ratio, which relates bitterness to original gravity points.
BU = IBU ÷ Original Gravity Points
For our Pale Ale:
35 ÷ 52 = 0.67
This suggests a noticeably bitter but reasonably balanced starting point for the style.
However, BU is not a complete sensory model. Two beers with the same ratio can taste different because of residual extract, water composition, acidity, alcohol, carbonation, and hop character.
Treat the ratio as a design reference, not an absolute rule.
Most importantly, define a target range rather than expecting brewing predictions to match every number perfectly.
A recipe that produces 1.051 instead of 1.052 is not necessarily worse. What matters is whether the finished beer meets its intended character.
3. Match the Recipe to Your Brewing Equipment
One of the most common recipe-design mistakes is creating a technically attractive recipe without considering the equipment that will be used to brew it.
A recipe developed for a highly efficient commercial brewhouse cannot simply be copied into a small homebrewing system with the expectation of identical results.
Every brewing setup has its own characteristics:
- Mash and lautering efficiency.
- Grain absorption.
- Boil-off rate.
- Kettle and trub losses.
- Hop-related wort losses.
- Fermenter transfer losses.
- Mash temperature stability.
- Practical capacity limits.
These factors affect ingredient quantities and the final amount of beer.
Understand efficiency before calculating grain quantities
Brewing efficiency is often discussed as if it were a single number. In practice, different measurements describe different stages.
Mash efficiency describes how much of the grain’s potential extract reaches the kettle through mashing and wort collection.
Brewhouse efficiency normally describes the proportion of potential extract that reaches the fermenter. It also reflects losses between the kettle and fermenter.
This distinction matters.
If a brewing calculator asks for mash efficiency, entering a lower brewhouse efficiency figure may produce an incorrect grain calculation.
Always check which efficiency definition your brewing software uses.
Build an equipment profile
For our example, imagine a 35-liter all-in-one electric brewing system.
We will assume:
- Target volume into fermenter: 25 L (6.6 US gal).
- Boil duration: 60 minutes.
- Estimated brewhouse efficiency: 75%.
- Grain absorption: approximately 0.88 L/kg, based on the example’s assumed losses.
- Boil-off: 3.5 L/hour.
- Kettle and trub loss: 1 L.
These are illustrative equipment values, not universal settings.
A 35-liter system does not necessarily produce the same evaporation rate or efficiency as another 35-liter system.
Your own measurements are more useful than generic defaults.
We will calculate the exact example water volumes later, after establishing the grain bill.
4. Build a Grain Bill That Supports the Recipe
With the beer’s targets established, we can select the malts.
The objective is not to create the most interesting-looking ingredient list. It is to create the simplest grain bill capable of producing the desired gravity, flavor, color, and body.
For our American Pale Ale, we want:
- A reliable fermentable foundation.
- Gentle bread-like malt character.
- Moderate body.
- Very limited caramel sweetness.
- Enough malt presence to support the hops.
A suitable starting point is Pale Ale Malt supported by a small amount of Vienna Malt and a modest quantity of light dextrin malt.
For a deeper explanation of ingredient functions and grain percentages, see our guide to building a malt bill for your own beer recipe.
Here we will focus on how the malt choices fit into the complete recipe.
Estimate the total grain quantity
Our target is 25 liters of wort at approximately 1.052 OG, transferred into the fermenter.
With an assumed brewhouse efficiency of around 75%, a grain bill of approximately 5.7 kg (12.6 lb) is a reasonable preliminary estimate, using typical malt extract potentials.
The calculation is only approximate because different malts have different laboratory extract yields. The precise predicted OG must be checked in brewing software using the actual malt specifications and the correct efficiency model.
Instead of immediately increasing specialty malts, we begin with the fermentable base and add only what the flavor profile requires.
Our example grain bill
The following ingredients form a relatively simple, hop-supporting malt foundation.
Recipe Development / Grain Bill
Example Malt Composition
25 L American Pale Ale · Assumed brewhouse efficiency approximately 75%
| Ingredient | Weight | Percentage | Purpose |
|---|---|---|---|
| Pale Ale Malt | 5.30 kg / 11.68 lb | 93.0% | Fermentable base, gentle bread-like malt character |
| Vienna Malt | 0.25 kg / 0.55 lb | 4.4% | Subtle toasted-bread complexity |
| Light Dextrin Malt | 0.15 kg / 0.33 lb | 2.6% | Small supporting addition; optional depending on malt and process |
| Total | 5.70 kg / 12.57 lb | 100% | Estimated OG near 1.052 at the assumed efficiency |
Why keep the grain bill simple?
Pale Ale Malt provides most of the extract and much of the intended malt character.
Vienna Malt adds a small amount of warm, bread-like complexity without making the beer heavily caramelized.
The light dextrin malt is a minor optional adjustment, rather than a requirement for a successful Pale Ale. Its contribution to body and foam will depend on the product, the rest of the grain bill, and the brewing process.
We deliberately avoid adding several dark Crystal Malts or large amounts of strongly flavored specialty grains.
They could be appropriate in a different Pale Ale, but they would move this recipe away from our original goal.
This is a fundamental principle:
Every ingredient should improve a defined characteristic of the finished beer. If you cannot explain why it belongs in the recipe, reconsider whether you need it.
Check gravity and color together
After entering the grain bill into a recipe calculator, verify that the estimated OG is reasonably close to the target.
Then examine the predicted color.
Remember that malt color values vary by manufacturer and batch. Two malts sold under similar names may not contribute identical amounts of color or flavor.
If the recipe is too dark, do not automatically reduce the total grain weight. That could also reduce the OG.
Instead, adjust the proportions or selection of malts while preserving the required fermentable extract.
Similarly, if the estimated OG is too low, increasing a strongly flavored specialty malt simply to gain gravity may damage the recipe’s balance.
The base malt is normally the most logical place to make a small gravity correction.
5. Design the Hop Schedule Around Bitterness and Aroma
Hops perform several different functions in beer, and those functions need to be coordinated.
For our Pale Ale, we want a noticeable bitterness that supports rather than overwhelms the malt, together with recognizable citrus and floral hop aroma.
The first decision is the sensory goal, not the number of hop varieties.
We can divide the hop schedule into three broad functions:
Bittering: Establishing the intended bitterness level.
Late-boil and whirlpool additions: Building hop flavor and aroma, with varying contributions to bitterness.
Dry hopping: Increasing hop aroma through contact with beer during or after fermentation.
This distinction does not mean that each addition has only one effect. Late additions can contribute bitterness, and hop-derived aroma compounds are affected by temperature, contact time, and fermentation.
Our existing guide to choosing and combining hops for your beer recipe explores hop selection in detail.
Here, we will concentrate on how the selected varieties form one complete schedule.
Choose a clear hop direction
For this example:
- Magnum provides efficient bittering.
- Centennial contributes citrus and floral hop character.
- Cascade supports the citrus and floral profile with a classic American Pale Ale identity.
This gives us a recognizable hop profile without unnecessary complexity.
The exact weights depend on the alpha-acid percentages printed on the hop packages.
Never assume that two batches of the same hop variety have identical bitterness potential.
Plan bitterness before adjusting aroma
Our target is approximately 35 IBU.
We can first calculate the estimated bitterness from the traditional boil additions, then assess the additional contribution of the whirlpool.
For example, using the Tinseth model and the assumptions of this recipe, a schedule with Magnum at 60 minutes, Centennial at 10 minutes, and Cascade at 5 minutes can provide roughly 33 calculated IBU before counting any additional whirlpool bitterness.
A warm whirlpool may increase that estimate, but the contribution is highly dependent on temperature, time, cooling behavior, and the calculation model.
This is why a recipe described as “35 IBU” should be understood as a predicted design target, not a guaranteed laboratory result.
Example hop schedule
The following schedule assumes Magnum at 12% alpha acids, Centennial at 10%, and Cascade at 6%. Adjust the weights if the actual hops differ.
Recipe Development / Hop Schedule
Bitterness, Flavor and Aroma
Example for 25 L (6.6 US gal). All hop quantities are starting estimates.
| Hop | Amount | Timing | Main Role |
|---|---|---|---|
| Magnum · 12% AA | 20 g / 0.71 oz | 60 min boil | Main bitterness |
| Centennial · 10% AA | 25 g / 0.88 oz | 10 min boil | Bitterness and citrus-floral flavor |
| Cascade · 6% AA | 25 g / 0.88 oz | 5 min boil | Late hop character and some bitterness |
| Cascade · 6% AA | 30 g / 1.06 oz | Whirlpool, approx. 80°C / 176°F, 15 min | Flavor and aroma; variable bitterness |
| Cascade | 35 g / 1.23 oz | Optional dry hop, about 2–3 days | Additional fresh hop aroma |
What about whirlpool and dry hopping?
A whirlpool addition at approximately 80°C (176°F) can help build hop flavor and aroma while generally producing less isomerization than boiling, but it is not a zero-bitterness process.
The contribution depends on how long the wort remains hot, how quickly it cools, and the temperature profile throughout the hop contact period.
Dry hopping is a separate decision.
For our Pale Ale, a small optional Cascade dry hop can reinforce the citrus and floral character. However, the beer should already have a coherent hop profile without it.
This distinction is useful when creating a new recipe:
First design a balanced beer. Then decide whether extra aroma will genuinely improve it.
More hops do not automatically create a better beer. Large additions may also increase cost, wort loss, hop-related polyphenols, and oxygen-exposure risks during handling.
For this recipe, we would evaluate the first batch before deciding whether the dry hop should become a permanent feature.
6. Choose Yeast and Predict the Fermentation Profile
Yeast is not simply the final ingredient added to the recipe. It is one of the main factors determining how the finished beer will taste.
Its attenuation, ester production, flocculation, and fermentation behavior can dramatically change the outcome.
For our American Pale Ale, the desired fermentation character is relatively clean.
We want the malt and hops to remain the main sensory features, rather than prominent banana, clove, spicy, or strongly fruity fermentation notes.
A suitable choice would be a clean American ale strain, such as a US-05-type yeast.
Our detailed article about choosing the right yeast for your beer recipe explains the differences between yeast profiles, attenuation, fermentation temperature, and pitching requirements.
For the complete recipe, we need to make three decisions.
A. What final gravity do we expect?
Our estimated FG is 1.011.
From an OG of 1.052, this requires approximately 79% apparent attenuation.
That is a reasonable planning target for a suitable American ale yeast fermenting an adequately fermentable wort.
However, the manufacturer’s attenuation range does not guarantee the same number in every recipe.
Mash conditions, wort composition, yeast health, fermentation temperature, and other factors all influence the actual result.
B. What fermentation temperature should we choose?
A starting fermentation temperature of approximately 19–20°C (66–68°F) is a reasonable choice for this example and a suitable clean American ale strain.
The actual temperature of the beer matters more than the surrounding room temperature.
Active fermentation generates heat, meaning the beer inside the fermenter can be warmer than the ambient air.
Temperature control should therefore focus on the fermenting wort whenever possible.
Do not assume fermentation is finished after a predetermined number of days. Confirm completion using stable gravity measurements and the yeast’s expected behavior.
C. How much yeast should we pitch?
Pitching rate should be chosen according to batch size, gravity, yeast format, and manufacturer guidance.
For example, Fermentis specifies a dosage range of 50–80 g/hL for SafAle US-05. For 25 liters, that corresponds to approximately 12.5–20 g of dry yeast.
Different products may have different recommendations.
A healthy, appropriate yeast pitch and adequate oxygen availability at the start of fermentation are important. Once fermentation has begun, avoid unnecessary oxygen exposure.
Design the fermentation schedule
For our example, a practical plan is:
- Cool the wort to the intended yeast-pitching temperature.
- Pitch an appropriate quantity of healthy yeast.
- Maintain approximately 19–20°C during the main fermentation, with adjustments based on the chosen strain and its requirements.
- Allow fermentation to complete, including appropriate maturation and cleanup.
- Confirm stable final gravity before cold crashing or packaging.
- Minimize oxygen exposure during transfer and packaging.
The recipe now has a defined fermentation direction rather than simply a yeast name written on a sheet.
7. Design Mash Temperature and Fermentability Together
Mash temperature can influence wort fermentability and therefore the final gravity and body of the beer.
This is particularly important because our target is not simply 5.4% alcohol. We also want a moderately dry finish with enough body to support the hops.
A mash temperature around 66°C (151°F) is a reasonable starting point for our American Pale Ale.
A straightforward mash schedule could be:
- Single-infusion mash at 66°C (151°F).
- Approximately 60 minutes, with conversion verified when appropriate.
- Optional mash-out or temperature increase according to the brewing system.
- Sparging with appropriately treated water, taking care not to over-sparge.
The actual result depends on malt properties, mash pH, mash duration, and the temperature distribution within the mash.
Why not simply mash as low as possible?
Lower mash temperatures often favor a more fermentable wort within the normal enzymatic working range, but they are not a guarantee of an extremely dry beer.
Conversely, a higher mash temperature does not automatically produce a better, fuller-bodied beer.
The correct temperature is the one that supports the intended fermentation profile.
For our example, we want enough fermentability to reach the planned FG while preserving a pleasant malt foundation.
If the first batch finishes noticeably sweeter than intended, mash temperature may be one variable to investigate — but it should not be adjusted without also considering yeast performance, actual fermentation completion, and the grain bill.
8. Plan Water Chemistry Without Losing Sight of the Beer
Water chemistry can influence mash performance, bitterness perception, malt presentation, and the overall impression of the beer.
However, water treatment should support a recipe, not become a collection of arbitrary mineral targets.
For our American Pale Ale, the goal is straightforward:
A balanced, hop-supporting water profile without excessive harshness or an unnecessarily heavy mouthfeel.
Sulfate can reinforce the perception of hop bitterness and dryness.
Chloride can contribute to the impression of fullness and roundness.
The relationship between them can be useful, but sulfate-to-chloride ratio alone is not enough to define a good water profile.
Absolute concentrations, calcium, alkalinity, mash pH, and the beer’s composition all matter.
Establish a realistic mash pH target
For this type of Pale Ale, a measured mash pH around 5.3–5.5 at room temperature is a practical starting target.
Mash pH should be measured using a properly calibrated meter and a cooled sample.
The pH of untreated brewing water is not the same as mash pH. Grain composition and water alkalinity can significantly change the result.
Brewing salts and acids should be calculated from the starting water composition.
Do not copy mineral addition quantities from another brewer’s recipe without knowing the water that was used.
The important design decisions are:
- Does the mash pH support efficient conversion and suitable wort character?
- Is there enough appropriate mineral content for the brewing process?
- Does the finished beer need a stronger hop-bitter impression or a softer, rounder balance?
- Are the proposed additions reasonable for the actual source water?
These questions prevent water treatment from becoming unnecessarily complicated.
9. Calculate Water Volumes and Brewing Losses
A well-designed ingredient list is only useful if the brewing system can produce the intended quantity of wort.
This is where many otherwise good homebrewing recipes become inaccurate.
Suppose our target is 25 liters into the fermenter.
That does not mean we should begin with 25 liters of brewing water.
We need enough water to account for grain absorption, evaporation, and wort left behind in the kettle.
The basic relationship is:
Total brewing water = Target fermenter volume + Grain absorption + Boil-off + Kettle and trub losses + Other relevant losses
For a specific brewing system, additional factors such as nonrecoverable mash-tun dead space, hop absorption, or transfers may also need to be considered. Do not count the same loss twice.
Example calculations
We assume:
- 5.7 kg of grain.
- Approximately 5 L retained by the grain.
- 3.5 L lost through evaporation during a one-hour boil.
- 1 L of wort left behind with trub and hop material.
- 25 L transferred into the fermenter.
This gives a preliminary total brewing water requirement of 34.5 liters (9.1 US gallons).
The following table shows how the volumes fit together.
Brewhouse Planning / Water Balance
From Brewing Water to Fermenter
Illustrative volume plan for a 25 L American Pale Ale batch.
| Stage | Volume | Calculation |
|---|---|---|
| Total Brewing Water | 34.5 L / 9.11 US gal | Estimated starting volume |
| Mash Water | 19.5 L / 5.15 US gal | Example mash liquor allocation |
| Sparge Water | 15.0 L / 3.96 US gal | Remainder of brewing water |
| Grain Absorption | 5.0 L / 1.32 US gal | Estimated retained liquid |
| Pre-Boil Volume | 29.5 L / 7.79 US gal | 34.5 − 5.0 |
| Boil-Off | 3.5 L / 0.92 US gal | 60-minute boil estimate |
| Post-Boil Volume | 26.0 L / 6.87 US gal | 29.5 − 3.5 |
| Kettle / Trub Loss | 1.0 L / 0.26 US gal | Estimated wort left behind |
| Into Fermenter | 25.0 L / 6.60 US gal | 26.0 − 1.0 |
Why volume planning matters for recipe accuracy
Brewing losses do not only change the amount of beer produced. They can also change how accurately the recipe meets its target gravity.
If the actual evaporation rate is higher than expected, the remaining wort may become more concentrated.
If too much water is collected before the boil, the final gravity may be lower than planned unless the process is adjusted.
For our example, the planned 29.5-liter pre-boil volume and 26-liter post-boil volume are linked to the gravity calculation.
If the post-boil wort reaches approximately 1.052 at 26 liters, leaving one liter of wort behind does not make the remaining 25 liters more concentrated. It simply reduces the volume transferred into the fermenter.
This is a useful distinction between wort concentration and extract recovery.
The most reliable approach is to record your actual volumes and gravity readings over several brewing sessions.
After a few consistent batches, the equipment profile becomes far more useful than generic brewing assumptions.
Remember: a recipe designed for 25 liters into the fermenter may produce less than 25 liters of packaged beer because of fermentation sediment, dry-hop material, and transfer losses.
10. Review the Entire Recipe Before Brew Day
At this stage, our recipe has most of its essential components:
- A clearly defined sensory objective.
- Target gravity, alcohol, bitterness, and color.
- A grain bill designed around the intended flavor.
- A complete hop schedule.
- A yeast choice and fermentation target.
- A suitable mash temperature.
- A water-treatment strategy.
- A batch-size and loss calculation.
Now comes one of the most important parts of recipe design: checking whether all these decisions are consistent.
A recipe can contain individually reasonable decisions that do not work particularly well together.
For example, consider a Pale Ale designed with a very high finishing gravity, large amounts of sweet specialty malt, soft bitterness, and an extremely expressive fruit-forward yeast.
None of these choices is necessarily incorrect on its own.
But together, they may create a beer that is much sweeter, fuller, and fruitier than the crisp, balanced Pale Ale we originally intended.
The final review should therefore focus on the interaction between ingredients and processes.
Use brewing software as a verification tool
A reliable recipe calculator can estimate OG, FG, ABV, IBU, color, batch volumes, and other important parameters.
You can use the free Beer Recipe Builder and brewing calculators on Tattooist Craft Beer to organize the recipe, check its predicted values, and prepare a printable brewing plan.
Begin by entering the correct equipment profile.
Then add the grain bill, hop additions, yeast, mash schedule, and relevant water information.
Check the results rather than assuming the first calculation is correct.
Ask yourself:
Does the predicted OG match the intended alcohol strength?
Does the yeast and mash combination support the expected FG?
Is the bitterness appropriate for both the style and the malt balance?
Does the hop schedule match the intended aroma profile?
Will the brewing equipment comfortably handle the grain and water volumes?
Are all quantities based on the same batch-size definition?
A brewing calculator can identify inconsistencies, but it cannot replace sensory judgment.
It also cannot guarantee the exact bitterness extracted from a whirlpool, the final effect of a dry hop, or the flavor produced by a particular yeast under all conditions.
Use predictions to make better decisions, not as promises of exact results.
11. Convert the Recipe Into a Practical Brew-Day Plan
A complete recipe should explain not only what ingredients to use, but also how and when to use them.
For our American Pale Ale, the brewing plan could follow this sequence.
Before brewing
Check the freshness and specifications of your ingredients.
Confirm the hop alpha-acid percentages, yeast condition, and malt quantities.
Prepare the brewing water according to its measured composition.
Clean and sanitize equipment according to its function. Brewing vessels and tools that contact cooled wort or beer require particular attention to sanitization.
During mashing
Heat the brewing water to the appropriate strike temperature for the equipment, grain temperature, and target mash conditions.
Mash at approximately 66°C (151°F).
Maintain reasonably stable temperature and allow sufficient time for conversion.
When measuring mash pH, use a properly calibrated meter and a cooled sample.
During wort collection and boiling
Collect the planned pre-boil volume.
Measure and record the actual volume and gravity.
Boil for the intended duration and add hops according to the recipe schedule.
Monitor evaporation and avoid uncontrolled boilovers, especially when operating close to the kettle’s practical capacity.
During chilling and fermentation
Cool the wort efficiently and safely.
Transfer the intended volume into a clean, sanitized fermenter, minimizing contamination risks.
Pitch the appropriate yeast quantity and follow the planned temperature profile.
Allow fermentation to finish, checking gravity instead of relying on the calendar alone.
During packaging
Verify that fermentation is complete.
If bottle conditioning, calculate priming sugar from the intended carbonation level, actual beer volume, and residual dissolved CO₂. Never use a predicted FG as proof that fermentation has finished.
For this American Pale Ale, approximately 2.3–2.5 volumes of CO₂ would be a reasonable carbonation target.
Avoid unnecessary oxygen exposure, particularly if the beer has been dry hopped.
Record the final packaged volume, actual FG, and any changes made during brewing.
The recipe is now a reproducible process, not just a collection of ingredients.
12. Compare Your Brewing Results With the Original Targets
Recipe design does not end when the wort enters the fermenter.
The first brew provides real measurements that can confirm or challenge the assumptions used in the recipe.
Suppose our planned Pale Ale had these targets:
- OG: 1.052.
- FG: 1.011.
- ABV: approximately 5.4%.
- IBU: approximately 35.
- Clean fermentation with noticeable citrus and floral hop aroma.
Now imagine the actual batch produces:
- OG: 1.048.
- FG: 1.012.
- ABV: approximately 4.7%.
The beer may still taste excellent, but it did not achieve the intended original gravity.
Before changing the ingredients, we need to identify why.
Was the brewing efficiency lower than expected?
Was the collected volume too high?
Was there a measurement or temperature-correction error?
Did the grain crush or lautering process affect extract recovery?
Increasing the grain bill without understanding the cause might solve the gravity difference on the next batch, but it could also conceal an equipment or process problem.
Separate technical results from sensory results
There are two different evaluations to make.
Technical evaluation: Did the brewing process produce the predicted volumes, gravity, fermentation performance, and packaging results?
Sensory evaluation: Does the finished beer taste the way we originally intended?
A technically accurate recipe can still produce an unremarkable beer.
Likewise, a beer that misses its predicted gravity by a few points may be delicious.
Both forms of evaluation are necessary.
Taste the beer systematically
Instead of asking only, “Is this beer good?”, examine the qualities defined at the beginning.
Aroma: Is the citrus and floral hop character noticeable? Does it seem fresh and appropriate?
Flavor: Does the malt support the hops, or does one dominate?
Bitterness: Is it pleasant, too soft, harsh, or lingering?
Mouthfeel: Is the body appropriate, or does the beer seem thin or heavy?
Finish: Does it encourage another sip, or leave too much sweetness or bitterness?
Fermentation character: Is the yeast profile clean and suitable for the intended style?
Overall balance: Does the beer match the original sensory description?
These observations turn personal taste into useful brewing feedback.
13. Improve the Next Batch Without Changing Everything
The final stage is controlled recipe refinement.
One of the most common mistakes is making too many changes between batches.
Imagine that your first Pale Ale is slightly sweeter than intended and lacks some hop aroma.
You could simultaneously reduce the specialty malt, change the yeast, lower the mash temperature, increase the bittering hops, double the whirlpool addition, and add a large dry hop.
The next beer would certainly be different.
But even if it tasted better, you would have difficulty knowing which changes were responsible.
A more useful approach is to identify the most important problem and modify one or two relevant variables.
Example: the beer finishes too sweet
First establish whether the problem is actual residual extract, perceived sweetness, or an imbalance between sweetness and bitterness.
Check the measured FG, fermentation completion, malt bill, yeast performance, and bitterness.
Only then decide whether to change the mash temperature, fermentation conditions, or ingredient composition.
Example: insufficient hop aroma
If bitterness and malt balance are already good, there may be no reason to change the bittering addition.
Instead, consider the late-hop schedule, whirlpool conditions, dry-hopping approach, packaging oxygen exposure, and the freshness of the hops.
Example: bitterness is too harsh
Check more than the calculated IBU.
Excessive or unpleasant bitterness may involve mineral balance, wort pH, hop material, polyphenols, or processing conditions.
Simply removing bittering hops without investigating the character of the bitterness may not address the real problem.
Example: the beer is too thin
Compare the actual FG with the predicted value.
Evaluate mash conditions, grain composition, attenuation, alcohol content, carbonation, and overall balance.
Sometimes a very small adjustment is enough to improve the mouthfeel.
Other times the problem is not the recipe at all.
The best recipe revisions are guided by measurements and tasting notes, not guesswork.
Keep a record of each version.
A simple naming system such as Pale Ale V1, V2, V3 is often enough, provided that each version includes the relevant measurements and a description of the changes.
Over time, this creates a personal brewing database based on your actual equipment and preferences.
14. Common Beer Recipe Design Mistakes
Even experienced homebrewers can fall into predictable traps when designing new recipes.
Using too many ingredients
More malts and more hop varieties do not automatically create more complexity.
If several ingredients contribute similar characteristics, the resulting beer can become less distinctive rather than more interesting.
Designing alcohol content without considering final gravity
Two beers with similar ABV can have very different levels of residual extract, body, and perceived sweetness.
OG and FG should be considered together.
Assuming a calculated IBU is exact
Bitterness calculations are useful approximations, not laboratory guarantees.
Actual hop utilization changes with brewing conditions, and hot-side hop additions after the boil make predictions more difficult.
Copying another brewer’s efficiency
A recipe designed for 80% efficiency may produce a different OG on a system operating at 65–70%.
Calibrate ingredient quantities using your own measured performance.
Ignoring fermenter and kettle losses
If the recipe targets 25 liters of finished beer but only accounts for 25 liters into the fermenter, the packaged volume will probably be lower.
Define the target volume precisely.
Treating yeast as interchangeable
Different strains can produce different attenuation, flavor, clarity, and fermentation behavior from the same wort.
Yeast choice is part of the recipe’s identity.
Changing the recipe before identifying the problem
Not every disappointing result requires different ingredients.
Some problems come from temperature control, incomplete fermentation, oxidation, packaging, or measurement errors.
A disciplined brewer distinguishes recipe formulation from process performance.
Frequently Asked Questions About Beer Recipe Design
How do I design my first beer recipe?
Begin with a familiar beer style and a clear description of the intended flavor. Choose realistic OG, FG, ABV, IBU, and color targets, then build a simple grain bill, hop schedule, and yeast plan that support those targets. Check the recipe against your equipment profile before brewing.
How many malts should a beer recipe contain?
There is no ideal number. Many excellent beers use just one or two malts, while some styles benefit from several. The important consideration is what each malt contributes to the beer. Complexity should serve the intended flavor, not exist for its own sake.
Should I design the hops or the grain bill first?
Start with the finished beer’s sensory objectives and target values. The grain bill establishes the fermentable and malt foundation, while the hop schedule develops bitterness, flavor, and aroma. In practice, these parts of the recipe should be adjusted together until they support the intended balance.
How accurate are beer recipe calculators?
They are valuable estimation tools when supplied with realistic equipment data, ingredient specifications, and brewing assumptions. Their predictions become more useful as you calibrate your process with actual measurements. Some characteristics, especially hop aroma, whirlpool bitterness, and perceived mouthfeel, remain difficult to predict precisely.
Can I create a beer recipe without following a traditional style?
Absolutely. Beer styles provide helpful reference points, but recipe design does not require strict adherence to them. You can combine ingredients and processes creatively as long as the intended outcome is clear and the brewing plan is technically sound.
How do I know whether a beer recipe is successful?
A successful recipe consistently produces a beer that matches its intended sensory profile and can be repeated with reasonable accuracy. Hitting numerical targets is useful, but flavor, balance, aroma, drinkability, and repeatability are equally important.
Final Thoughts: Design With Purpose, Brew With Precision
Creating your own beer recipe is one of the most rewarding parts of homebrewing.
It is the moment when you move beyond following instructions and begin making deliberate decisions about how your beer should taste.
The process does not need to be complicated.
Start with a clear sensory goal. Establish realistic brewing targets. Build a grain bill with a purpose. Coordinate bitterness and aroma. Choose the right yeast and fermentation conditions. Account for your brewing equipment and water. Then measure, taste, and refine the result.
Every batch becomes an opportunity to improve your understanding.
A great beer recipe is not necessarily the one with the most ingredients, the highest bitterness, or the most unusual combination of hops.
It is the recipe in which every ingredient, number, and brewing decision contributes to the beer you intended to create.
Design with intention. Brew with precision. Refine with experience.
The Tattooist Craft Beer — Art • Ink • Beer • Life