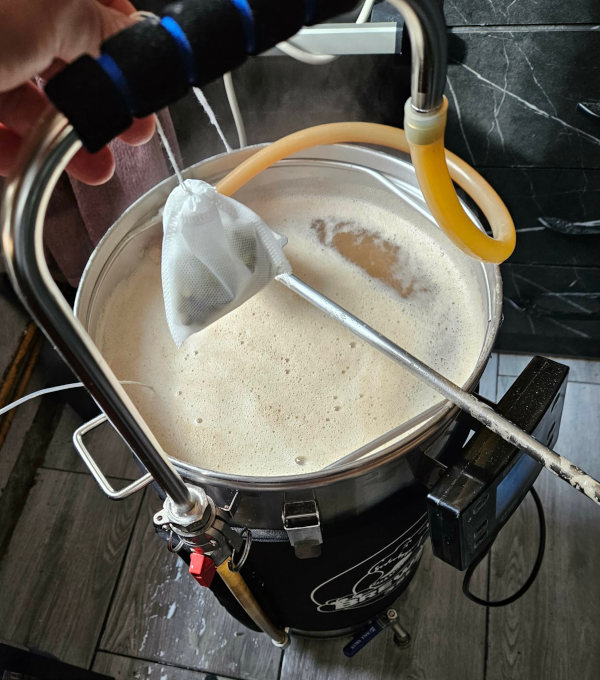
Mashing is one of the most important stages of all-grain brewing. This is where crushed malt and warm water come together and the enzymes naturally present in the malt begin converting starch into sugars.
Those sugars will later be consumed by yeast during fermentation.
The mash therefore has a major influence on the beer’s fermentability, body, mouthfeel and final gravity. It also contributes to the amount of extract we obtain from the grain.
At first, terms such as mash-in, alpha-amylase, beta-amylase, mash-out and sparging may sound complicated. In practice, the basic process is quite easy to understand.
Let’s go through it step by step.
What Actually Happens During the Mash?
Malted barley contains a large amount of starch.
Yeast, however, cannot efficiently ferment those large starch molecules directly. They first need to be broken down into smaller sugars.
This is where enzymes become important.
Two of the best-known enzymes involved in this process are:
Beta-amylase (β-amylase) – produces a large proportion of smaller, highly fermentable sugars such as maltose.
Alpha-amylase (α-amylase) – breaks larger starch molecules at different points, producing a mixture of shorter carbohydrates, including sugars and dextrins.
Both enzymes work during a normal mash.
The mash temperature changes the balance between their activities, which is why changing the mash temperature can change the character of the finished beer.
This doesn’t mean that at 64°C only beta-amylase works and at 69°C only alpha-amylase works. Their effective temperature ranges overlap considerably.
That’s an important detail that simplified brewing charts sometimes miss.
Mash In – Starting the Mash
Mash-in is simply the point when crushed malt is mixed with the brewing water.
The water is usually heated slightly above the desired mash temperature because the room-temperature grain will cool it when added.
For example, if your target mash temperature is:
65°C
your strike water may need to be several degrees warmer. The exact temperature depends on the amount and temperature of the grain, water-to-grain ratio and brewing equipment.
Once the grain is thoroughly mixed with the water, check the temperature.
Try to avoid dry clumps of grain – often called dough balls – because the water needs good access to the crushed malt.
Now the mash begins.
Why Is 65°C Such a Common Mash Temperature?
Because it is a useful middle ground.
At around 65°C, both major starch-converting enzyme systems can contribute effectively. The resulting wort generally contains plenty of fermentable sugar while retaining enough less-fermentable material to prevent the beer from becoming excessively thin.
That’s why approximately 65–67°C is such a common range for Pale Ales, IPAs, many lagers and numerous other beer styles.
A typical schedule might therefore be:
65°C – 60 minutes
For many modern, well-modified malts, this is more than enough time for conversion under normal conditions.
What Happens If I Mash at a Lower Temperature?
A mash around 62–64°C generally favors the production of a more fermentable wort.
The yeast can consume a greater proportion of those sugars, potentially producing:
- a lower final gravity;
- a drier finish;
- a lighter body;
- somewhat higher attenuation.
This can work well when you want a particularly crisp or dry beer.
However, the statement “lower mash temperature = higher alcohol” is too simplistic.
Alcohol depends primarily on how much fermentable extract is present in the wort and how far the yeast attenuates it. Mash temperature is only one factor affecting that.
What Happens If I Mash at a Higher Temperature?
At approximately 68–70°C, the balance shifts toward a less fermentable wort containing a greater proportion of dextrins.
The finished beer will often have:
- a higher final gravity;
- fuller body;
- greater mouthfeel;
- more residual extract.
This is useful for beers where a richer body is desirable.
But another common simplification should be avoided:
higher mash temperature does not automatically mean a sweet beer.
Perceived sweetness also depends on the malt bill, yeast attenuation, bitterness, alcohol, water chemistry and other factors.
A beer mashed at 69°C can be full-bodied without tasting obviously sweet.
Mash Temperature Guide
| Mash temperature | General tendency | Typical result |
|---|---|---|
| 62–64°C | More fermentable wort | Drier, lighter finish |
| 65–67°C | Balanced fermentability | Medium body and attenuation |
| 68–70°C | Less fermentable wort | Fuller body, higher FG |
These ranges are guidelines rather than rigid rules.
Instead of thinking:
63°C = IPA
66°C = Pale Ale
69°C = Stout
think about what you want from the specific beer.
You can make a dry stout with a relatively low mash temperature or deliberately mash an IPA somewhat warmer when you want more body.
The target beer should determine the mash schedule, not simply the style name.
Mash pH – The Other Important Number
Temperature gets most of the attention, but mash pH is also important.
A useful target for many beers is approximately:
pH 5.2–5.4 measured at room temperature
A somewhat broader range can still produce perfectly good beer, but this area generally provides favorable conditions for mash chemistry and wort quality.
Your grain and brewing water determine where the mash naturally lands.
This is why simply copying somebody else’s quantity of lactic or phosphoric acid is not a good approach. Two brewers can use exactly the same malt recipe but need different acid additions because their water contains different amounts of alkalinity.
Measure when possible and adjust according to your own water and recipe.
Should I Stir the Mash?
Yes, but there is no need to stir continuously.
At mash-in, mix the grain thoroughly to eliminate dry areas and achieve an even temperature.
For a traditional insulated mash tun, occasional stirring can help equalize temperature, although every time you open the vessel you may lose some heat.
With an electric all-in-one brewing system, the wort is often recirculated through the grain bed instead.
Recirculation helps maintain a more even temperature and can produce clearer wort.
But more flow is not automatically better.
If the pump pulls wort through the grain too aggressively, the grain bed can compact and restrict flow, potentially causing a stuck mash or poor recirculation.
So rather than saying that the pump should always run at “50–60%,” use enough flow to maintain steady circulation without compacting the grain bed.
Different systems and grain bills behave differently.
Mash Out – Finishing the Mash
After the main conversion rest, some brewers perform a mash-out.
For example:
75°C for 10 minutes
Mash-out raises the temperature of the entire mash before lautering and sparging.
Its main purposes are to reduce wort viscosity, make runoff easier and greatly reduce further enzymatic activity.
One correction to a common explanation is important:
Mash-out is not performed to ensure starch conversion.
By this point, conversion should already be essentially complete.
Mash-out is also optional.
Many homebrewers make excellent beer without performing one, particularly with certain brewing systems or processes.
If your equipment makes mash-out easy, it can be useful. If not, don’t assume your beer will fail without it.
Lautering – Separating Wort From Grain
Once mashing is complete, the sweet liquid needs to be separated from the grain.
This liquid is called wort.
The process of separating wort from the spent grain is called lautering.
In a traditional mash tun, the grain bed itself becomes a natural filter. Some brewers initially return the first cloudy runoff to the top of the grain bed until it becomes clearer. This traditional step is called vorlauf.
With an all-in-one electric brewing system, recirculation during the mash may already have performed much of this clarification.
Once the wort has been separated, there is still a considerable amount of sugar trapped between and inside the wet grains.
That’s where sparging comes in.
What Is Sparging?
Sparging is the process of rinsing the grain with additional brewing water to recover more of the remaining extract.
In a typical homebrew setup, the grain basket is raised or the wort is drained from the mash tun and warm sparge water is passed gently through the grain.
The original article suggested 77–79°C sparge water. That’s possible in some processes, but I would not present it as a universal target.
A common practical range is approximately:
75–78°C
The exact temperature is less important than avoiding unnecessarily harsh extraction conditions.
Don’t aggressively wash the grain forever just to extract the final little bit of sugar.
Very excessive sparging, particularly as the runoff becomes dilute and its pH rises, can encourage extraction of unwanted husk compounds and produce a harsher, more astringent beer.
The goal is good extraction, not maximum extraction at any cost.
Sparge Slowly
Don’t dump all the water onto the grain as quickly as possible.
Allow it to move through the grain bed relatively evenly.
With a grain basket, distribute the water across the surface instead of continuously pouring it into one small spot.
This helps rinse the grain more uniformly.
Continue until you reach your intended pre-boil volume, taking your equipment losses and expected boil-off into account.
What Is Pre-Boil Gravity?
This is a useful measurement for a homebrewer.
Before boiling, take a wort sample, cool it to the appropriate measurement temperature and measure its gravity with a hydrometer, or use a properly calibrated refractometer.
This tells you whether the mash and sparge produced approximately the amount of extract you expected.
If your recipe predicts:
Pre-boil gravity: 1.045
and you measure:
1.044
you’re very close.
If you measure only:
1.035
something during milling, mashing, lautering or sparging may have reduced your efficiency.
Learning to measure pre-boil volume and pre-boil gravity makes troubleshooting much easier than discovering only at the end of the brew day that your OG is too low.
From Mash to Boil
Once you’ve collected the required volume of wort, the mash stage is finished.
The wort can now be brought to a boil.
A common boil length is:
60 minutes
although not every beer must use exactly 60 minutes.
During the boil, several things happen: the wort is concentrated through evaporation, unwanted volatile compounds are driven off, proteins coagulate, the wort is sanitized, and hops can contribute bitterness, flavor and aroma.
Hop Timing – The Simple Version
For a beginner, hop additions can be understood roughly like this:
Early boil additions
Primarily contribute bitterness because much of the delicate aroma is lost during the long boil.
Late boil additions
Contribute more hop flavor and aroma while still adding some bitterness.
Flameout / whirlpool additions
Emphasize hop flavor and aroma with less bitterness than long-boil additions.
Dry hopping
Takes place on the fermentation side rather than in the mash or boil and is primarily used to add fresh hop aroma.
This is deliberately simplified – hop chemistry deserves its own article.
Cooling the Wort
After boiling, cool the wort to a temperature appropriate for the yeast you intend to pitch.
The original version specified 20–22°C, but that is not a universal pitching temperature.
It may be appropriate for many ale strains, but lager yeasts and some specialty strains may require very different temperatures.
Always check the recommended fermentation range for your specific yeast.
A wort chiller is one of the most useful pieces of equipment for this job.
Rapid cooling also encourages the formation of cold break, helping proteins and other material precipitate from the wort. Good sanitation becomes increasingly important once the wort has cooled because it is no longer protected by boiling temperatures.
Transfer and Fermentation
Transfer the cooled wort into a clean and properly sanitized fermenter.
At this point, measure your Original Gravity (OG).
Pitch the appropriate amount of healthy yeast and ferment at the temperature recommended for that strain.
From this point onward, the mash has done its job.
The starch originally locked inside the grain has been converted into a mixture of sugars and dextrins, extracted into the wort and prepared for the yeast.
The next transformation belongs to fermentation.
A Simple Mash Process for Beginners
For a straightforward first all-grain brew, the entire process can be summarized like this:
1. Heat the strike water.
Calculate it so the grain and water settle around your target mash temperature.
2. Mash in.
Mix the crushed grain thoroughly with the water.
3. Mash at approximately 65°C for 60 minutes.
Keep the temperature reasonably stable.
4. Check mash pH if possible.
Around 5.2–5.4 at room temperature is a useful target for many recipes.
5. Mash out if desired.
Raise to approximately 75°C for about 10 minutes.
6. Lauter.
Separate the sweet wort from the grain.
7. Sparge.
Rinse the grain gently with appropriately prepared warm water.
8. Check pre-boil volume and gravity.
9. Begin the boil.
That’s really the heart of mashing.
Once you understand what the enzymes are doing, why temperature matters and what sparging is actually trying to achieve, the process becomes much less mysterious.
You stop simply following instructions such as “65°C for 60 minutes” and start understanding why the recipe asks you to do it.
Read this: Cleaning and Sanitization